AWS Set up: Difference between revisions
| (3 intermediate revisions by the same user not shown) | |||
| Line 12: | Line 12: | ||
=Install CLI= | =Install CLI= | ||
The default CLI is 1.x on linux. To install the latest you need to | The default CLI is 1.x on linux. To install the latest you need to | ||
<syntaxhighlight lang="bash"> | <syntaxhighlight lang="bash"> | ||
# If installed | # If installed | ||
| Line 21: | Line 20: | ||
sudo ./aws/install | sudo ./aws/install | ||
</syntaxhighlight> | </syntaxhighlight> | ||
You need to change shell before using | |||
=Searching Logs= | |||
To search the logs in AWS is a little hairy. I suspect there are plugins to make this a lot easier. So here goes | |||
<syntaxhighlight lang="bash"> | |||
aws logs filter-log-events \ | |||
--start-time date -d 2025-01-14T14:50:00Z +%s000 \ | |||
--end-time date -d 2025-01-16T14:50:00Z +%s000 \ | |||
--log-group-name <log group name> \ | |||
--filter-pattern <search text> | |||
--output text | |||
</syntaxhighlight> | |||
=Serverless= | =Serverless= | ||
This is an example of how to deploy serverless application. There are some perquisites before starting | This is an example of how to deploy serverless application. There are some perquisites before starting | ||
| Line 32: | Line 42: | ||
You will need to have a ~/.aws/config file which defines your AWS Profiles to use | You will need to have a ~/.aws/config file which defines your AWS Profiles to use | ||
<syntaxhighlight lang="bash"> | <syntaxhighlight lang="bash"> | ||
[bibble-nz-prod] | [profile bibble-nz-prod] | ||
region=ap-southeast-2 | region=ap-southeast-2 | ||
output=json | output=json | ||
[bibble-nz-nonprod] | [profile bibble-nz-nonprod] | ||
region=ap-southeast-2 | region=ap-southeast-2 | ||
output=json | output=json | ||
Latest revision as of 20:52, 15 January 2025
Introduction
This is the place where all of my setup I feel needs noting is done.
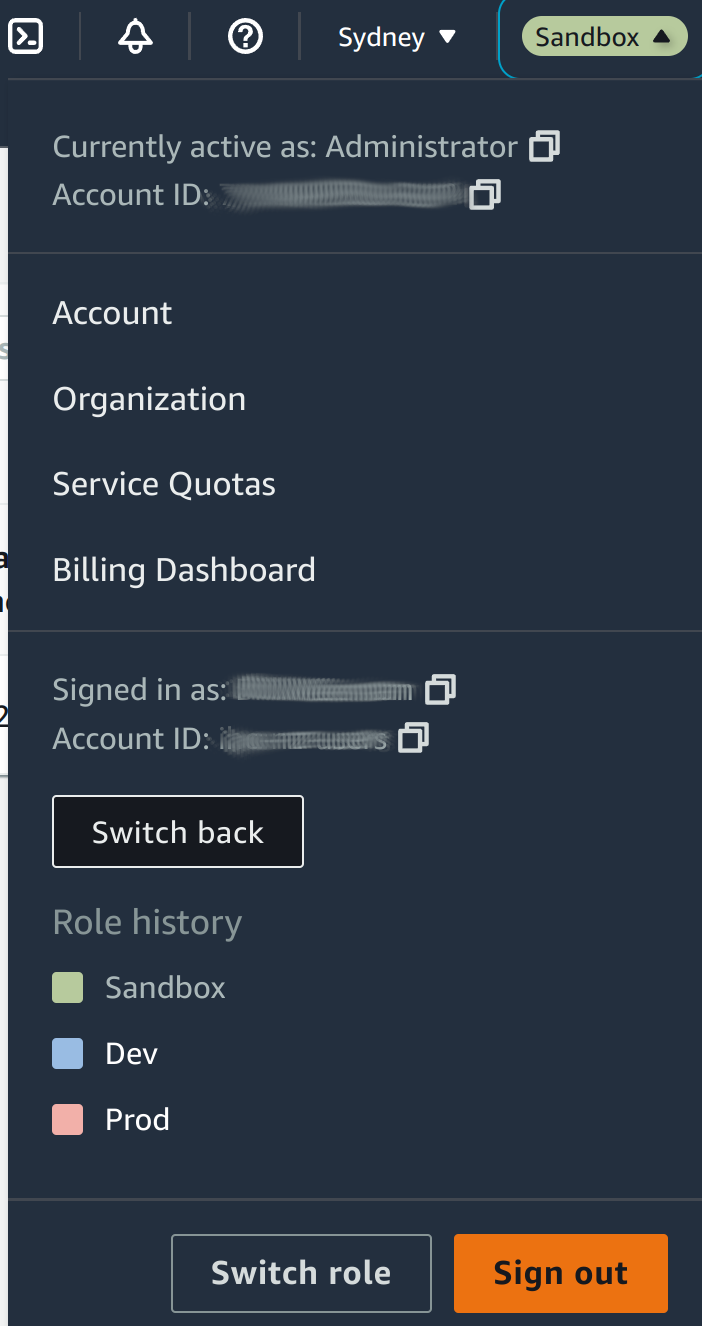
Roles
In AWS you can associate several roles with one user. To switch roles you can use the drop down on the right hand side of the page

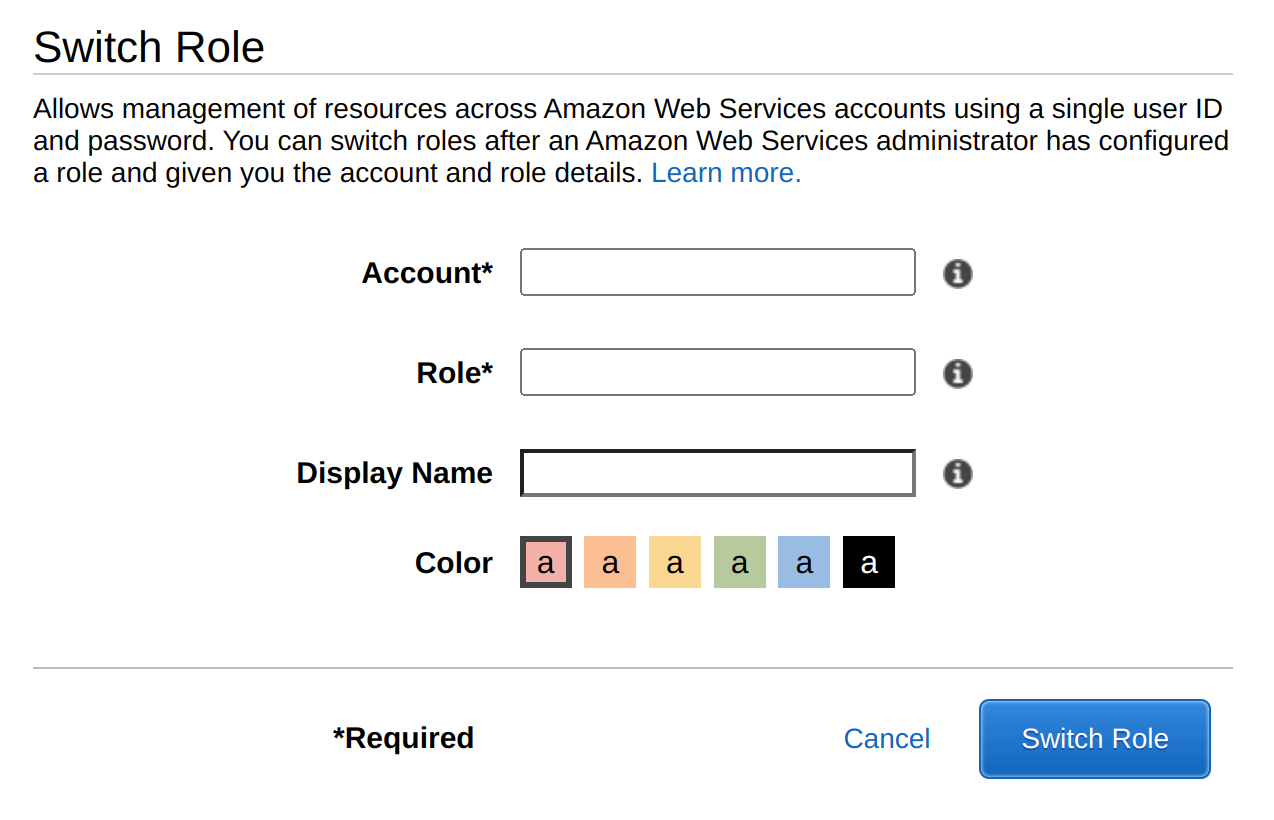
To create a new role to switch to you can press the SWITCH ROLE. You will need
- Account
- Role
- Choose a display name
Install CLI
The default CLI is 1.x on linux. To install the latest you need to
# If installed
sudo apt remove aws

curl "https://awscli.amazonaws.com/awscli-exe-linux-x86_64.zip" -o "awscliv2.zip"
unzip awscliv2.zip
sudo ./aws/install
You need to change shell before using
Searching Logs
To search the logs in AWS is a little hairy. I suspect there are plugins to make this a lot easier. So here goes
aws logs filter-log-events    \
    --start-time date -d 2025-01-14T14:50:00Z +%s000     \
    --end-time date -d 2025-01-16T14:50:00Z +%s000  \
    --log-group-name <log group name>  \
    --filter-pattern <search text>
    --output text
Serverless
This is an example of how to deploy serverless application. There are some perquisites before starting
sudo npm install -g serverless
sudo npm install -g serverless-bundle
sudo npm install -g aws-sdk
sudo npm install -g aws-cli
You will need to have a ~/.aws/config file which defines your AWS Profiles to use
 [profile bibble-nz-prod]
 region=ap-southeast-2
 output=json

 [profile bibble-nz-nonprod]
 region=ap-southeast-2
 output=json
You will need to have a ~/.aws/credentials file
 [bibble-nz-prod]
 aws_access_key_id=ABC1
 aws_secret_access_key=123

 [bibble-nz-nonprod]
 aws_access_key_id=ABC2
 aws_secret_access_key=456
We need to have a project to deploy. E.g. git clone myproject. From there we can deploy using
serverless deploy --stage dev --verbose
This will output with the following information
Service Information
service: <--- name of the service
stage: dev <--- the stage
region: ap-southeast-2
stack: <--- name of the thing created
resources: 29
api keys:
