Spring Example with VS Code: Difference between revisions
| Line 32: | Line 32: | ||
*Spring Initializer | *Spring Initializer | ||
==Create New Project== | ==Create New Project== | ||
You can do this using the Spring Initializer extension. For me the main change was to rename application.properties to application.yml so I could configure the project better. This included fixing the port and and the request header size | You can do this using the Spring Initializer extension. For this project we need | ||
*spring-boot-starter-web | |||
*spring-boot-starter-data-jpa | |||
For me the main change was to rename application.properties to application.yml so I could configure the project better. This included fixing the port and and the request header size | |||
<syntaxhighlight lang="yaml"> | <syntaxhighlight lang="yaml"> | ||
spring: | spring: | ||
| Line 41: | Line 44: | ||
max-http-request-header-size: 10MB | max-http-request-header-size: 10MB | ||
</syntaxhighlight> | </syntaxhighlight> | ||
=Making an Endpoint= | =Making an Endpoint= | ||
This again could not be easier. All I had to do was in the Java Project explorer, press plus against my application and it prompted me to add a class. Type in pingController and we were away. Just add annotations to controller and endpoint | This again could not be easier. All I had to do was in the Java Project explorer, press plus against my application and it prompted me to add a class. Type in pingController and we were away. Just add annotations to controller and endpoint | ||
Revision as of 06:12, 11 October 2024
Introduction
To make sure my Java is keeping up with my Typescript I revisited Spring to see what it would take to build a REST API using the Spring Web framework. The goal was
- Create a REST API
- Create GET endpoints
- Use a database in Spring
- Add Filtering to endpoint
- Add OAuth to endpoint
Installation
This was remarkably easy.
Install Java
sudo apt install default-jdk -y
Install Maven
We grab lastest and put it in /opt
  wget https://dlcdn.apache.org/maven/maven-3/3.9.9/binaries/apache-maven-3.9.9-bin.tar.gz
  sudo tar xf apache-maven-3.9.9-bin.tar.gz -C /opt
Make a profile in /etc/profile.d/maven.sh
export JAVA_HOME=/usr/lib/jvm/default-java
export M3_HOME=/opt/apache-maven-3.9.9
export MAVEN_HOME=/opt/apache-maven-3.9.9
export PATH=${M3_HOME}/bin:${PATH}
Now we can have an environment with . /etc/profile.d/maven.sh
VS Code Setup
For me I installed
- Java Extension Pack
- Spring Boot Extension Pack
- Spring Initializer
Create New Project
You can do this using the Spring Initializer extension. For this project we need
- spring-boot-starter-web
- spring-boot-starter-data-jpa
For me the main change was to rename application.properties to application.yml so I could configure the project better. This included fixing the port and and the request header size
spring:
  application:
    name: springbibble
server:
  port: 8082
  max-http-request-header-size: 10MB
Making an Endpoint
This again could not be easier. All I had to do was in the Java Project explorer, press plus against my application and it prompted me to add a class. Type in pingController and we were away. Just add annotations to controller and endpoint
@RestController
public class pingController {

    @GetMapping("/ping")
    public String ping() {
        return "pong";
    }
}
Adding Snowflake
ORM
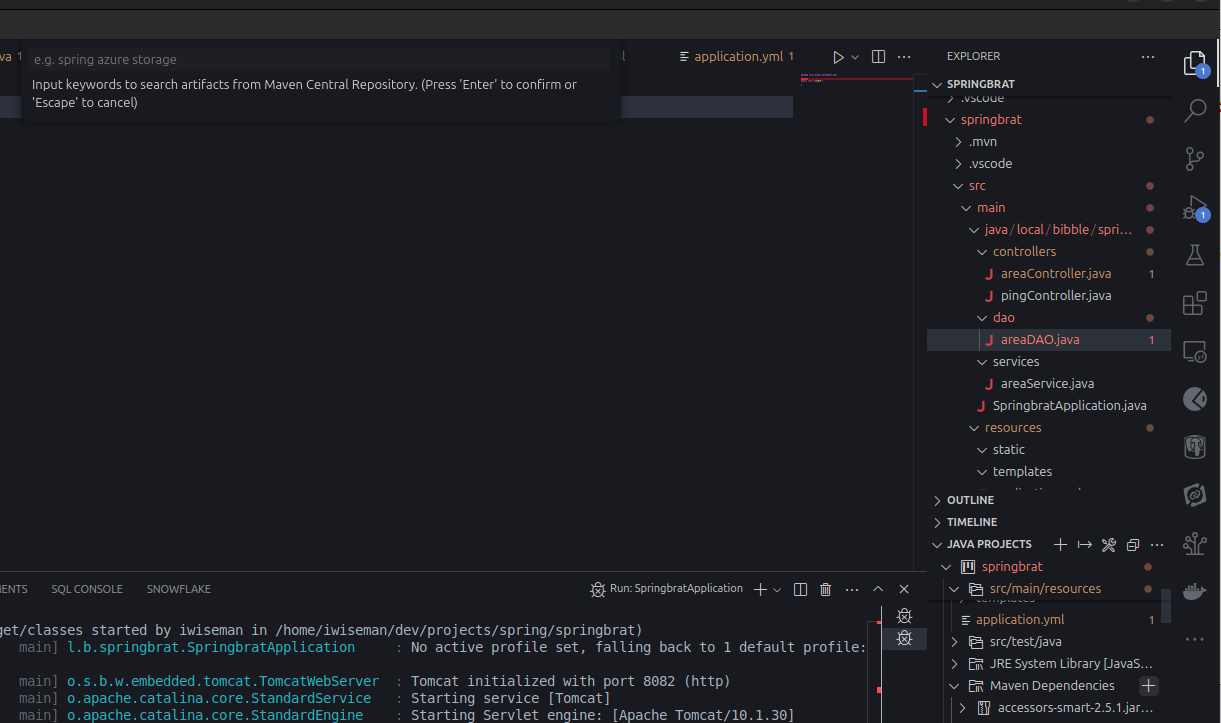
In the example I used they used hibernate dialect which is framework for ORM (Object/Relational Mapping) and Java Persistence API (JPA). We do this by using the extension. At the bottom right there is Maven Dependencies. Press the + and it will prompt you for a dependency name. In our case org.hibernate
 We need to make a default implementation which we can get from the documents
Snowflake Dependency
My last place used snowflake and wasn't keen but this is odd enough to demonstrate how to do it for anything. In pom.xml, add the dependency.
		<dependency>
			<groupId>net.snowflake</groupId>
    		<artifactId>snowflake-jdbc</artifactId>
    		<version>3.13.34</version>
		</dependency>