Spring Security
Introduction
Authentication
Spring Security Provides out of the box
- Basic Web From Authentication
- Ouath2 and OpenID Connect
- LDAP
- JWT JSon Web Tokens
Protection
Includes strategies for
- Session Fixation (Reusing of the Session ID)
- Clickjacking(UI redress attack)
- Cross Site Scripting
- Cross Site Request Forgery (CSRF)
Session Fixation (Reusing of the Session ID)
Session Fixation is an attack that permits an attacker to hijack a valid user session. The attack explores a limitation in the way the web application manages the session ID, more specifically the vulnerable web application. When authenticating a user, it doesn’t assign a new session ID, making it possible to use an existent session ID. The attack consists of obtaining a valid session ID (e.g. by connecting to the application), inducing a user to authenticate himself with that session ID, and then hijacking the user-validated session by the knowledge of the used session ID. The attacker has to provide a legitimate Web application session ID and try to make the victim’s browser use it.
Clickjacking(UI redress attack)
This is when an attacker uses multiple transparent or opaque layers to trick a user into clicking on a button or link on another page when they were intending to click on the top level page. Thus, the attacker is “hijacking” clicks meant for their page and routing them to another page, most likely owned by another application, domain, or both.
Cross Site Request Forgery (CSRF)
Cross-Site Request Forgery (CSRF) is an attack that forces an end user to execute unwanted actions on a web application in which they’re currently authenticated. With a little help of social engineering (such as sending a link via email or chat), an attacker may trick the users of a web application into executing actions of the attacker’s choosing. If the victim is a normal user, a successful CSRF attack can force the user to perform state changing requests like transferring funds, changing their email address, and so forth. If the victim is an administrative account, CSRF can compromise the entire web application.
Cross Site Scripting
Cross-Site Request Forgery (CSRF) is an attack that forces an end user to execute unwanted actions on a web application in which they’re currently authenticated. With a little help of social engineering (such as sending a link via email or chat), an attacker may trick the users of a web application into executing actions of the attacker’s choosing. If the victim is a normal user, a successful CSRF attack can force the user to perform state changing requests like transferring funds, changing their email address, and so forth. If the victim is an administrative account, CSRF can compromise the entire web application.
Spring Security Projects
The framework is broken own into different projects
- Spring Security Core
- Spring Security Config
- Spring Security Test
- Spring Security Web
- Spring Security Oauth
- Spring Security LDAP
Resources
Demos
https://github.com/wlesniak/spring-framework-securing-against-common-threats https://github.com/bh5k/spring-security-conference
Tomcat
Install Ubuntu 20.1
sudo useradd -m -U -d /opt/tomcat -s /bin/false tomcat
VERSION=9.0.35
wget https://www-eu.apache.org/dist/tomcat/tomcat-9/v${VERSION}/bin/apache-tomcat-${VERSION}.tar.gz -P /tmp
sudo tar -xf /tmp/apache-tomcat-${VERSION}.tar.gz -C /opt/tomcat/
sudo ln -s /opt/tomcat/apache-tomcat-${VERSION} /opt/tomcat/latest
sudo chown -R tomcat: /opt/tomcat
sudo sh -c 'chmod +x /opt/tomcat/latest/bin/*.sh'
sudo vi /etc/systemd/system/tomcat.service
Add the startup file
[Unit]
Description=Tomcat 9 servlet container
After=network.target

[Service]
Type=forking

User=tomcat
Group=tomcat

Environment="JAVA_HOME=/usr/lib/jvm/java-11-openjdk-amd64"
Environment="JAVA_OPTS=-Djava.security.egd=file:///dev/urandom -Djava.awt.headless=true"

Environment="CATALINA_BASE=/opt/tomcat/latest"
Environment="CATALINA_HOME=/opt/tomcat/latest"
Environment="CATALINA_PID=/opt/tomcat/latest/temp/tomcat.pid"
Environment="CATALINA_OPTS=-Xms512M -Xmx1024M -server -XX:+UseParallelGC"

ExecStart=/opt/tomcat/latest/bin/startup.sh
ExecStop=/opt/tomcat/latest/bin/shutdown.sh

[Install]
WantedBy=multi-user.target
And update systemctl
sudo systemctl daemon-reload
sudo systemctl enable --now tomcat
sudo systemctl status tomcat
Web Management
# Add above </tomcat-users>
sudo vi /opt/tomcat/latest/conf/tomcat-users.xml
   <role rolename="admin-gui"/>
   <role rolename="manager-gui"/>
   <user username="NotThis" password="NotThisEither" roles="admin-gui,manager-gui"/>
And to enable
# Manager App
sudo vi /opt/tomcat/latest/webapps/manager/META-INF/context.xml
# Host Manager App
sudo vi /opt/tomcat/latest/webapps/host-manager/META-INF/context.xml
Then add your host
<Context antiResourceLocking="false" privileged="true" >
  <CookieProcessor className="org.apache.tomcat.util.http.Rfc6265CookieProcessor"
                   sameSiteCookies="strict" />
  <Valve className="org.apache.catalina.valves.RemoteAddrValve"
         allow="127\.\d+\.\d+\.\d+|::1|0:0:0:0:0:0:0:1|192.168.50.1" />
  <Manager sessionAttributeValueClassNameFilter="java\.lang\.(?:Boolean|Integer|Long|Number|String)|org\.apache\.catalina\.filters\.CsrfPreventionFilter\$LruCache(?:\$1)?|java\.util\.(?:Linked)?HashMap"/>
Deploy in VS Code
I installed the tomcat and maven extension. Loaded up a dummy project from https://github.com/branflake2267/debugging-java-webapp and followed the instructions.
- clone the project
- goto Maven->plugins->war and right click war:exploded
- install tomcat for java extension for VS CODE. I have tons of trouble with this. Do not put anything in the settings and make sure the root tomcat has 777 permissions
- add a tomcat server
- goto the target project directory and right click run on tomcat server
Deploy in IntelliJ
First of all I needed to specify the location of the JDK when building the project.
env |grep JAVA_HOME
Going to Maven->Package->Build resulted in "Failed to execute goal org.apache.maven.plugins:maven-surefile-plugin:2.22 I had to add the following
Open your project, build and go to the Maven tab on the right. Select->lifecycle->right click package->Select Modify Configuration->
Getting Started
Introduction
We can add security to a new project with
        <dependencies>
...
                <dependency>
                        <groupId>org.springframework.boot</groupId>
                        <artifactId>spring-boot-starter-security</artifactId>
                </dependency>

                <dependency>
                        <groupId>org.springframework.security</groupId>
                        <artifactId>spring-security-test</artifactId>
                        <scope>test</scope>
                </dependency>

        </dependencies>
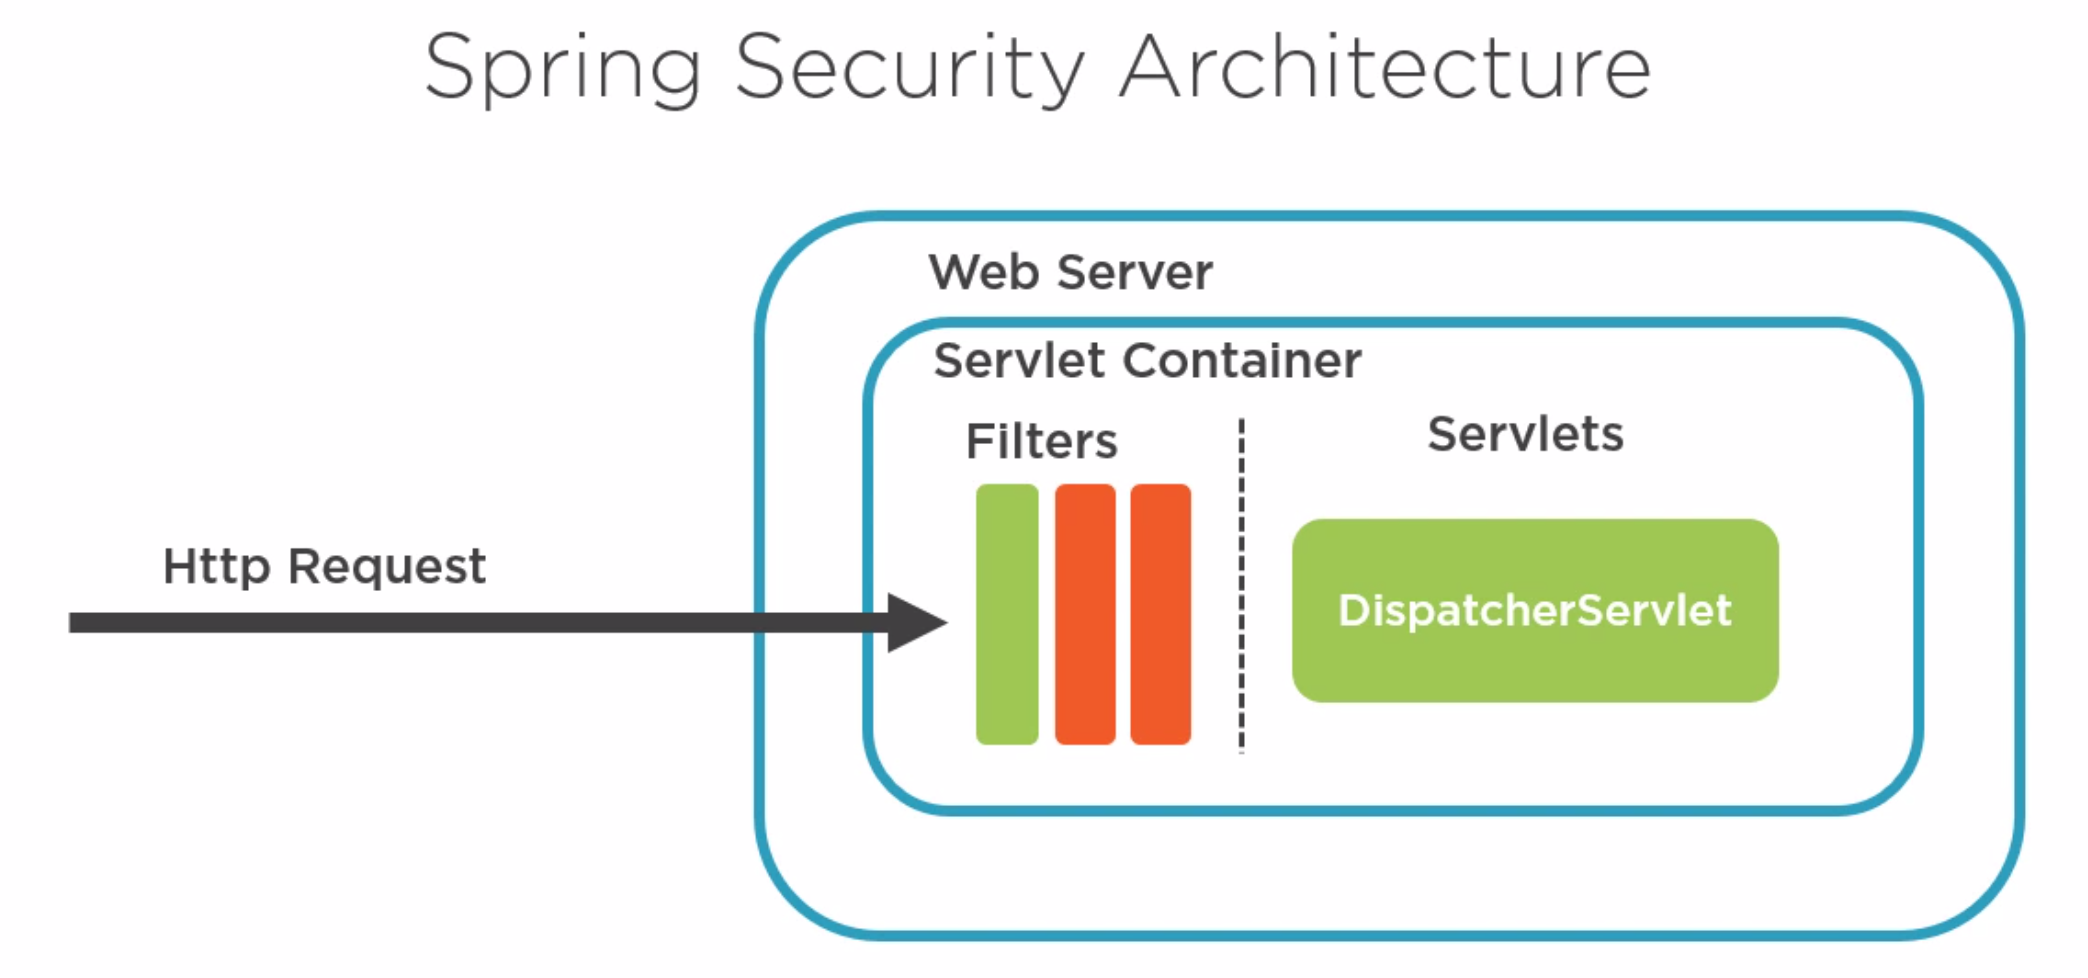
Spring uses Filters on request like interceptors in Angular. The filter

WebSecurityConfigurerAdapter
The WebSecurityConfigurerAdapter is a key class to configuring how spring behaves. I hope to go through and list the key points in this section.
Ant Matchers
The antMatchers is keyword controls how endpoints can be accessed. The word ant comes from the apache project ant. We need to ensure, for instance, assets and images are allowed to be accessed.
    protected void configure(final HttpSecurity http) throws Exception {
        http
                .authorizeRequests()
                //.antMatchers("/admin/**").hasRole("ADMIN")
                .antMatchers("/anonymous*").anonymous()
                .antMatchers("/login*").permitAll()
                .antMatchers("/account*").permitAll()
                .antMatchers("/password*").permitAll()
                .antMatchers("/assets/css/**", "assets/js/**", "/images/**").permitAll()
                .antMatchers("/index*").permitAll()
...
Login and Logout
Carrying on from about is the login and logout details.
...
                .anyRequest().authenticated()

                .and()
                .formLogin()
                .loginPage("/login")
                .loginProcessingUrl("/perform_login")
                .failureUrl("/login?error=true")
                .permitAll()
                .defaultSuccessUrl("/", true)
MvcConfigurer
We can now direct the Spring Mvc Configurer to use the page with.
@Configuration
public class ConferenceConfig implements WebMvcConfigurer {

    @Override
    public void addViewControllers(final ViewControllerRegistry registry) {
        registry.addViewController("/login");
    }
...
Example 1
In the Spring Boot Docs we see [here]
@Configuration(proxyBeanMethods=false)
 @ConditionalOnClass(value=org.springframework.security.config.annotation.web.configuration.WebSecurityConfigurerAdapter.class)
 @ConditionalOnMissingBean(value=org.springframework.security.config.annotation.web.configuration.WebSecurityConfigurerAdapter.class)
 @ConditionalOnWebApplication(type=SERVLET)
public class SpringBootWebSecurityConfiguration

extends Object
For basic authentication we use the WebSecurityConfigurationAdapter. This supports Web and Basic Authentication (Crikey). Here we can extend the class and override the configure
@Configuration
public class SecurityConfiguration extends WebSecurityConfigurerAdapter {

        @Override
        protected void configure(HttpSecurity http) throws Exception {
            http.authorizeRequests().anyRequests().authenticated()
            .and().httpBasic();
        }
}
Example 2
Here is a more complicated example. We can see some basic operations. E.g. Endpoints when logging in and logging out.
public class SecurityConfiguration extends WebSecurityConfigurerAdapter {

        @Override
        protected void configure(HttpSecurity http) throws Exception {
                http
                  .csrf()
                  .csrfTokenRepository(CookieCsrfTokenRepository.withHttpOnlyFalse())
                  .and()
                  .authorizeRequests()

                  .mvcMatchers(HttpMethod.GET,"/","/index.html","/portfolio").permitAll()
                  .anyRequest().authenticated()
                  .and()
                  .formLogin()
                  .loginProcessingUrl("/api/login")
                  .and()
                  .logout()
                  .logoutUrl("/api/logout")
                  .logoutSuccessUrl("/");
        }

        @Override
        protected void configure(AuthenticationManagerBuilder auth) throws Exception {
                auth.inMemoryAuthentication().withUser("victoria").password("
                   {noop}password").roles("ADMIN")
                .and().withUser("dave").password("{noop}password").roles("USER");
        }

        @Override
        public void configure(WebSecurity web) throws Exception {
                web.ignoring().antMatchers("/css/**", "/webjars/**","/js/**");
        }

}
Success Handling
We can define our own Success Handler by
@Component
public class CustomAuthenticationSuccessHandler implements AuthenticationSuccessHandler {

    @Override
    public void onAuthenticationSuccess(HttpServletRequest httpServletRequest, HttpServletResponse httpServletResponse, Authentication authentication) throws IOException, ServletException {
        //do some logic here if you want something to be done whenever
        //the user successfully logs in.

        HttpSession session = httpServletRequest.getSession();
        User authUser = (User) SecurityContextHolder.getContext().getAuthentication().getPrincipal();
        session.setAttribute("username", authUser.getUsername());
        session.setAttribute("authorities", authentication.getAuthorities());

        //set our response to OK status
        httpServletResponse.setStatus(HttpServletResponse.SC_OK);

        //since we have created our custom success handler, its up to us to where
        //we will redirect the user after successfully login
        httpServletResponse.sendRedirect("home");
    }
}
From here we can add the class to the formLogin method.
public class SecurityConfiguration extends WebSecurityConfigurerAdapter {

        @Override
        protected void configure(HttpSecurity http) throws Exception {
                http
                .csrf()
                        .csrfTokenRepository(CookieCsrfTokenRepository.withHttpOnlyFalse())
                .and()
                .authorizeRequests()
                        .mvcMatchers(HttpMethod.GET,"/","/index.html","/portfolio").permitAll()
                        .anyRequest().authenticated()
                        .and()
                .formLogin()
                        .loginPage("/api/login").successHandler(new CustomAuthenticationSuccessHandler())
                .and()
                .logout()
                        .logoutUrl("/api/logout")
                        .logoutSuccessUrl("/");
        }
Common Security Threats
Introduction
Spring Security provides default headers which can be customised
Caching
By default the headers turn off caching to avoid data being left behind in the browser. You can of course switch this on and it is recommended you do this on a page by page approach. To do this
public class SecurityConfiguration extends WebSecurityConfigurerAdapter {

        @Override
        protected void configure(HttpSecurity http) throws Exception {
                http
                  .headers().cacheControl().disable()
                  .mvcMatchers("/login").permitAll()
...
And in the Controller
@GetMapping("/users/{name}")
public ResponseEntity<UserDto> getUser(@PathVariable String name) {
    return ResponseEntity.ok()
      .cacheControl(CacheControl.maxAge(60, TimeUnit.SECONDS))
      .body(new UserDto(name));
}
Default Headers
Spring Security has a variety of default headers to protect the user. Try and understand them before ever changing the defaults. These include
 X-XSS-Protection: 1; mode=block
 X-Content-Type-Options: nosniff
 X-Frame-Options: DENY // ClickJacking
CSRF
This is implemented by default and generates a token like Microsoft Forgery tokens
Content Security Policy
This is turned off by default but when enable it can confine scripts to given domains for example. Well worth a look.
public class SecurityConfiguration extends WebSecurityConfigurerAdapter {

        @Override
        protected void configure(HttpSecurity http) throws Exception {
                http
                  .headers().contentSecurityPolicy("script-src: http://www.bibble....)
Http Firewall
Spring Security comes with a two types of firewall but of course you can override it to your needs
/**
 * Allow url encoded slash http firewall.
 *
 * @return the http firewall
 */
@Bean
public HttpFirewall allowUrlEncodedSlashHttpFirewall() {
    DefaultHttpFirewall firewall = new DefaultHttpFirewall();
    firewall.setAllowUrlEncodedSlash(true);
    return firewall;
}
HTTPS
Create a Keystore and Certificate
To create the JKS keystore
keytool -genkeypair -alias tomcat -keyalg RSA -keysize 2048 -keystore keystore.jks -validity 3650 -storepass password
To create the Certificate
keytool -genkeypair -alias tomcat -keyalg RSA -keysize 2048 -storetype PKCS12 -keystore keystore.p12 -validity 3650 -storepass password
Where
- genkeypair: generates a key pair
- alias: the alias name for the item we are generating
- keyalg: the cryptographic algorithm to generate the key pair
- keysize: the size of the key. We have used 2048 bits, but 4096 would be a better choice for production
- storetype: the type of keystore
- keystore: the name of the keystore
- validity: validity number of days
- storepass: a password for the keystore
Verify the Keystore Content and Convert to PKCS12
keytool -list -v -keystore keystore.jks
keytool -list -v -storetype pkcs12 -keystore keystore.p12
keytool -importkeystore -srckeystore keystore.jks -destkeystore keystore.p12 -deststoretype pkcs12
Enable in Application (Application.yml)
server:
  ssl:
    key-store: classpath:keystore.p12
    key-store-password: password
    key-store-type: pkcs12
    key-alias: tomcat
    key-password: password
  port: 8443
Configure Redirects
In the Spring Boot application we can now redirect with
@SpringBootApplication
public class WebApplication {

...
	public static void main(String[] args) {
		SpringApplication.run(WebApplication.class, args);
	}

	@Bean
    public ServletWebServerFactory servletContainer() {
        TomcatServletWebServerFactory tomcat = new TomcatServletWebServerFactory() {
            @Override
            protected void postProcessContext(Context context) {
                SecurityConstraint securityConstraint = new SecurityConstraint();
                securityConstraint.setUserConstraint("CONFIDENTIAL");
                SecurityCollection collection = new SecurityCollection();
                collection.addPattern("/*");
                securityConstraint.addCollection(collection);
                context.addConstraint(securityConstraint);
            }
        };
        tomcat.addAdditionalTomcatConnectors(redirectConnector());
        return tomcat;
    }

    private Connector redirectConnector() {
        Connector connector = new Connector("org.apache.coyote.http11.Http11NioProtocol");
        connector.setScheme("http");
        connector.setPort(8080);
        connector.setRedirectPort(8443);
        return connector;
    }
}
Spring Security As a Backend
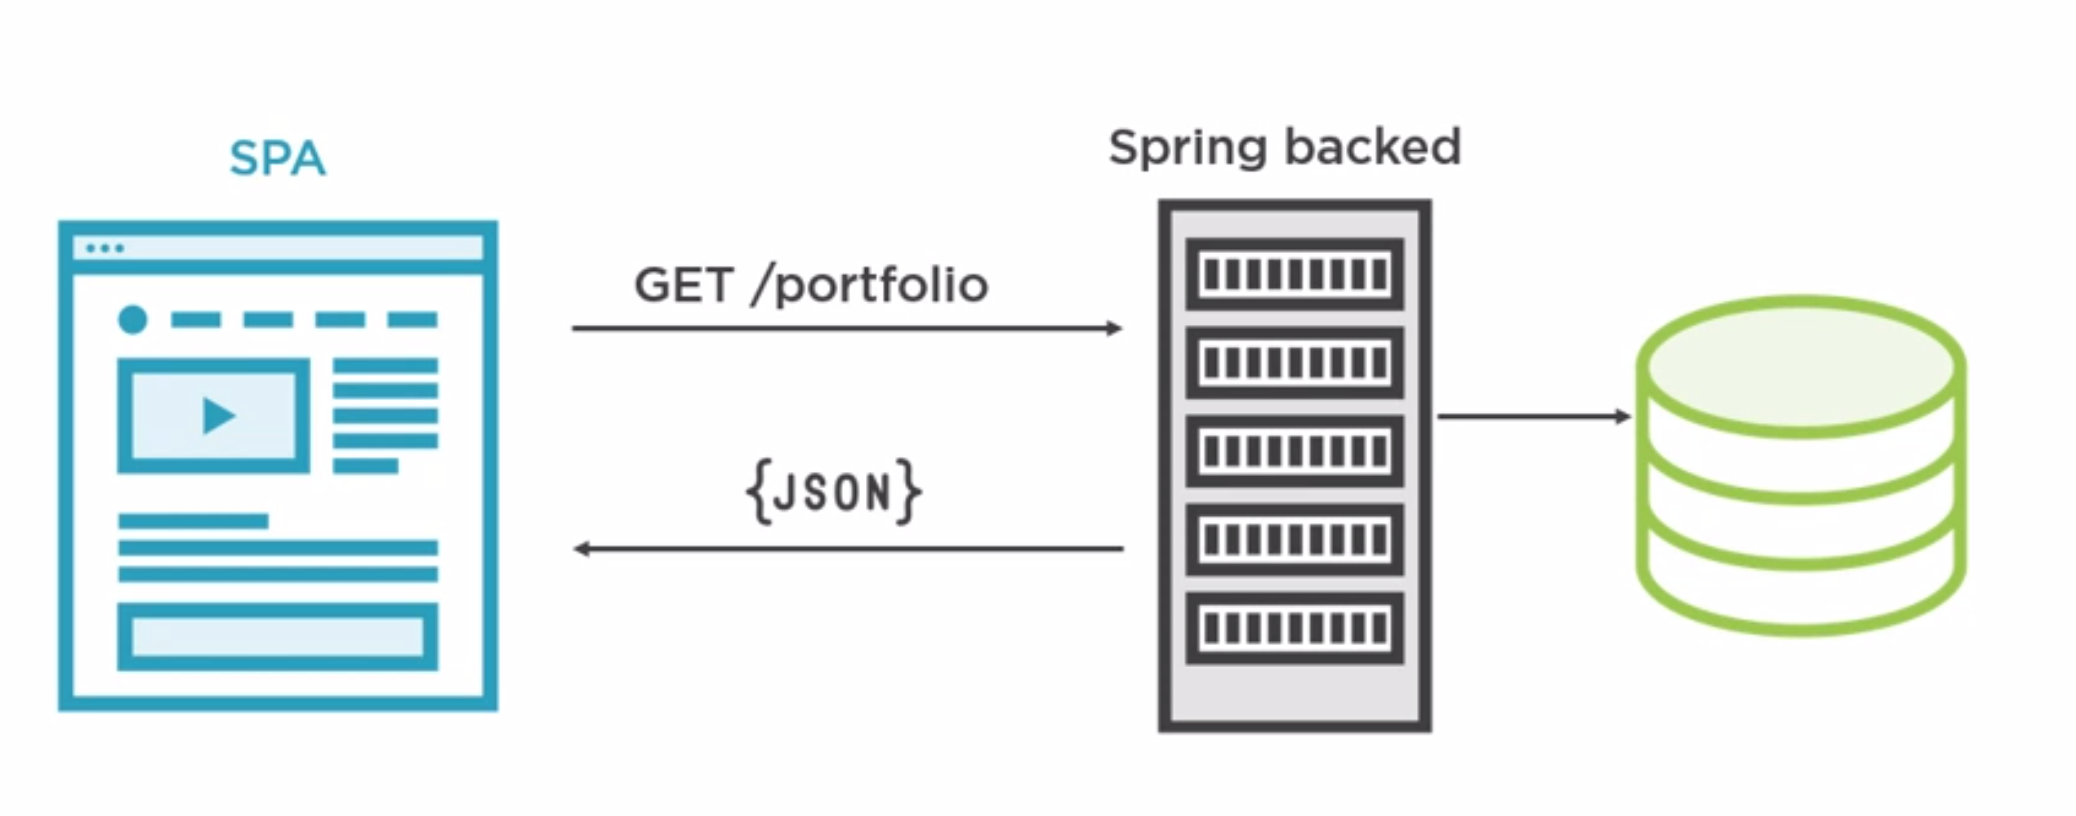
You can use spring as backend to standardise you authentication. So we can use spring in place of authentication in React or Angular.

Managing Secrets
To management secrets like for the key-store we can use Jasypt. We can put the encoded value in the Application.yml and put the password in and environment variable. Was not impressed with what I learned but did recommend auditing properly i.e. logging recording access with who when and why as secret was accessed.
Exception Handling
You can manage various codes with in Spring and provide your own page. Below is an example of AccessDeniedHandler. Simply create a class and decide what you would like to have happen. E.g. Audit the problem
public class CustomAccessDeniedHandler implements AccessDeniedHandler {

 private String errorPage;

 public CustomAccessDeniedHandler() {
 }

 public CustomAccessDeniedHandler(String errorPage) {
  this.errorPage = errorPage;
 }

 public String getErrorPage() {
  return errorPage;
 }

 public void setErrorPage(String errorPage) {
  this.errorPage = errorPage;
 }

 @Override
 public void handle(HttpServletRequest request, HttpServletResponse response,
  AccessDeniedException accessDeniedException)
                throws IOException, ServletException {

  //You can redirect to errorpage
  response.sendRedirect(errorPage);
 }
}
Make sure you add this to the WebSecurityConfigurerAdapter
public class SecurityConfiguration extends WebSecurityConfigurerAdapter {

        @Override
        protected void configure(HttpSecurity http) throws Exception {
                http
                  .exceptionHandling()
                  .accessDeniedPage("/access denise")
                  .accessDeniedHandler(new AccessDeniedHandler())
 ...