AWS Angular and React Apps
Introduction
This page is about using AWS and Angular and how to provision the apps in AWS
S3
This is a easy approach for simple all in one app. I.E. no database or other communication. Steps to do this are
- Create a bucket
- Enable Web Static Hosting
- Grant Permissions
- Upload Bucket
Create Bucket
Nothing special except the naming of the bucket as it determines the URL of the app. So a bucket named bill-angular-prod-app will have a URL of http://bill-angular-prod-app.s3-website-ap-southeast-2.amazonaws.com where ap-southeast-2 is the region.
Enable Web Static Hosting
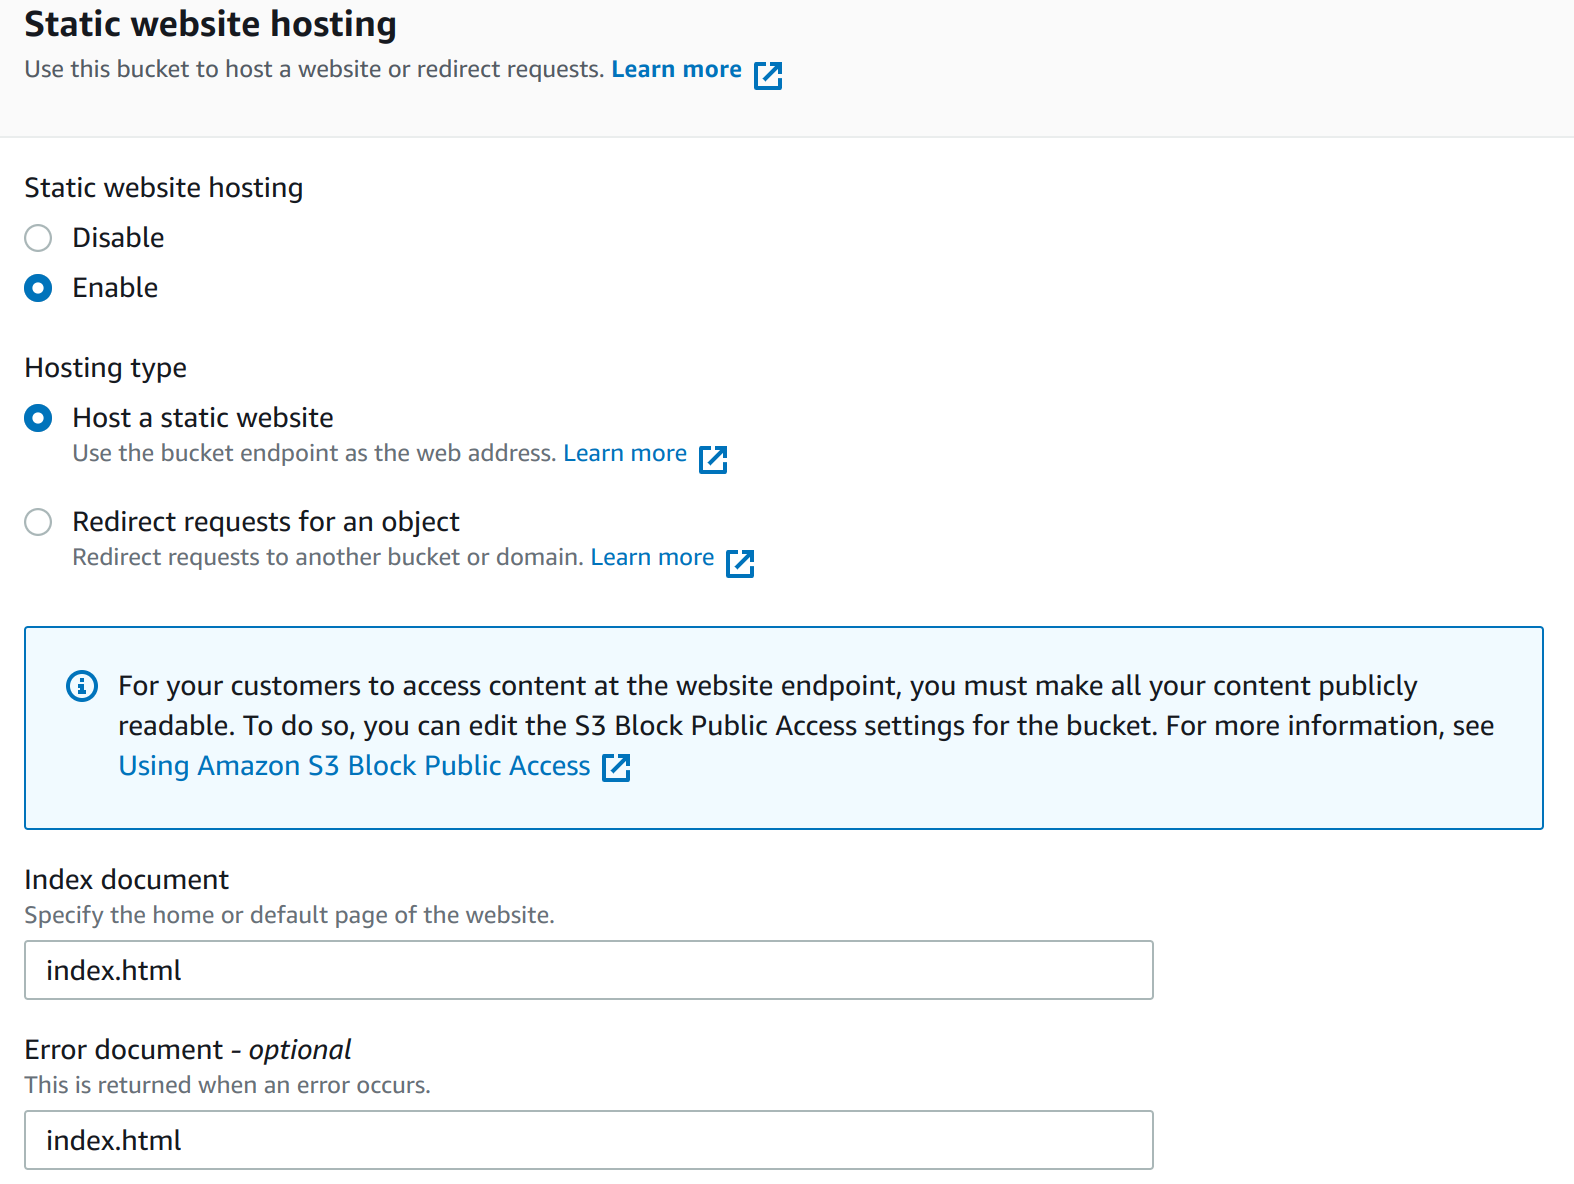
You will need to enable Static website hosting under properties for this to work and set the index and error document.

Grant Permissions
To allow public access you will need to disable Block public access which is on by default. Additionally you will need to add a Bucket policy. I did not have permission for mine but was able to on another account. <syntaxhightlight lang="json"> {
   "Version": "2012-10-17",
   "Statement": [
       {
           "Sid": "AddPermission",
           "Effect": "Allow",
           "Principal": "*",
           "Action": "s3:GetObject",
           "Resource": "arn:aws:s3:::bill-angular-prod-app/*"
       }
   ]
} </syntaxhightlight>
Upload Bucket
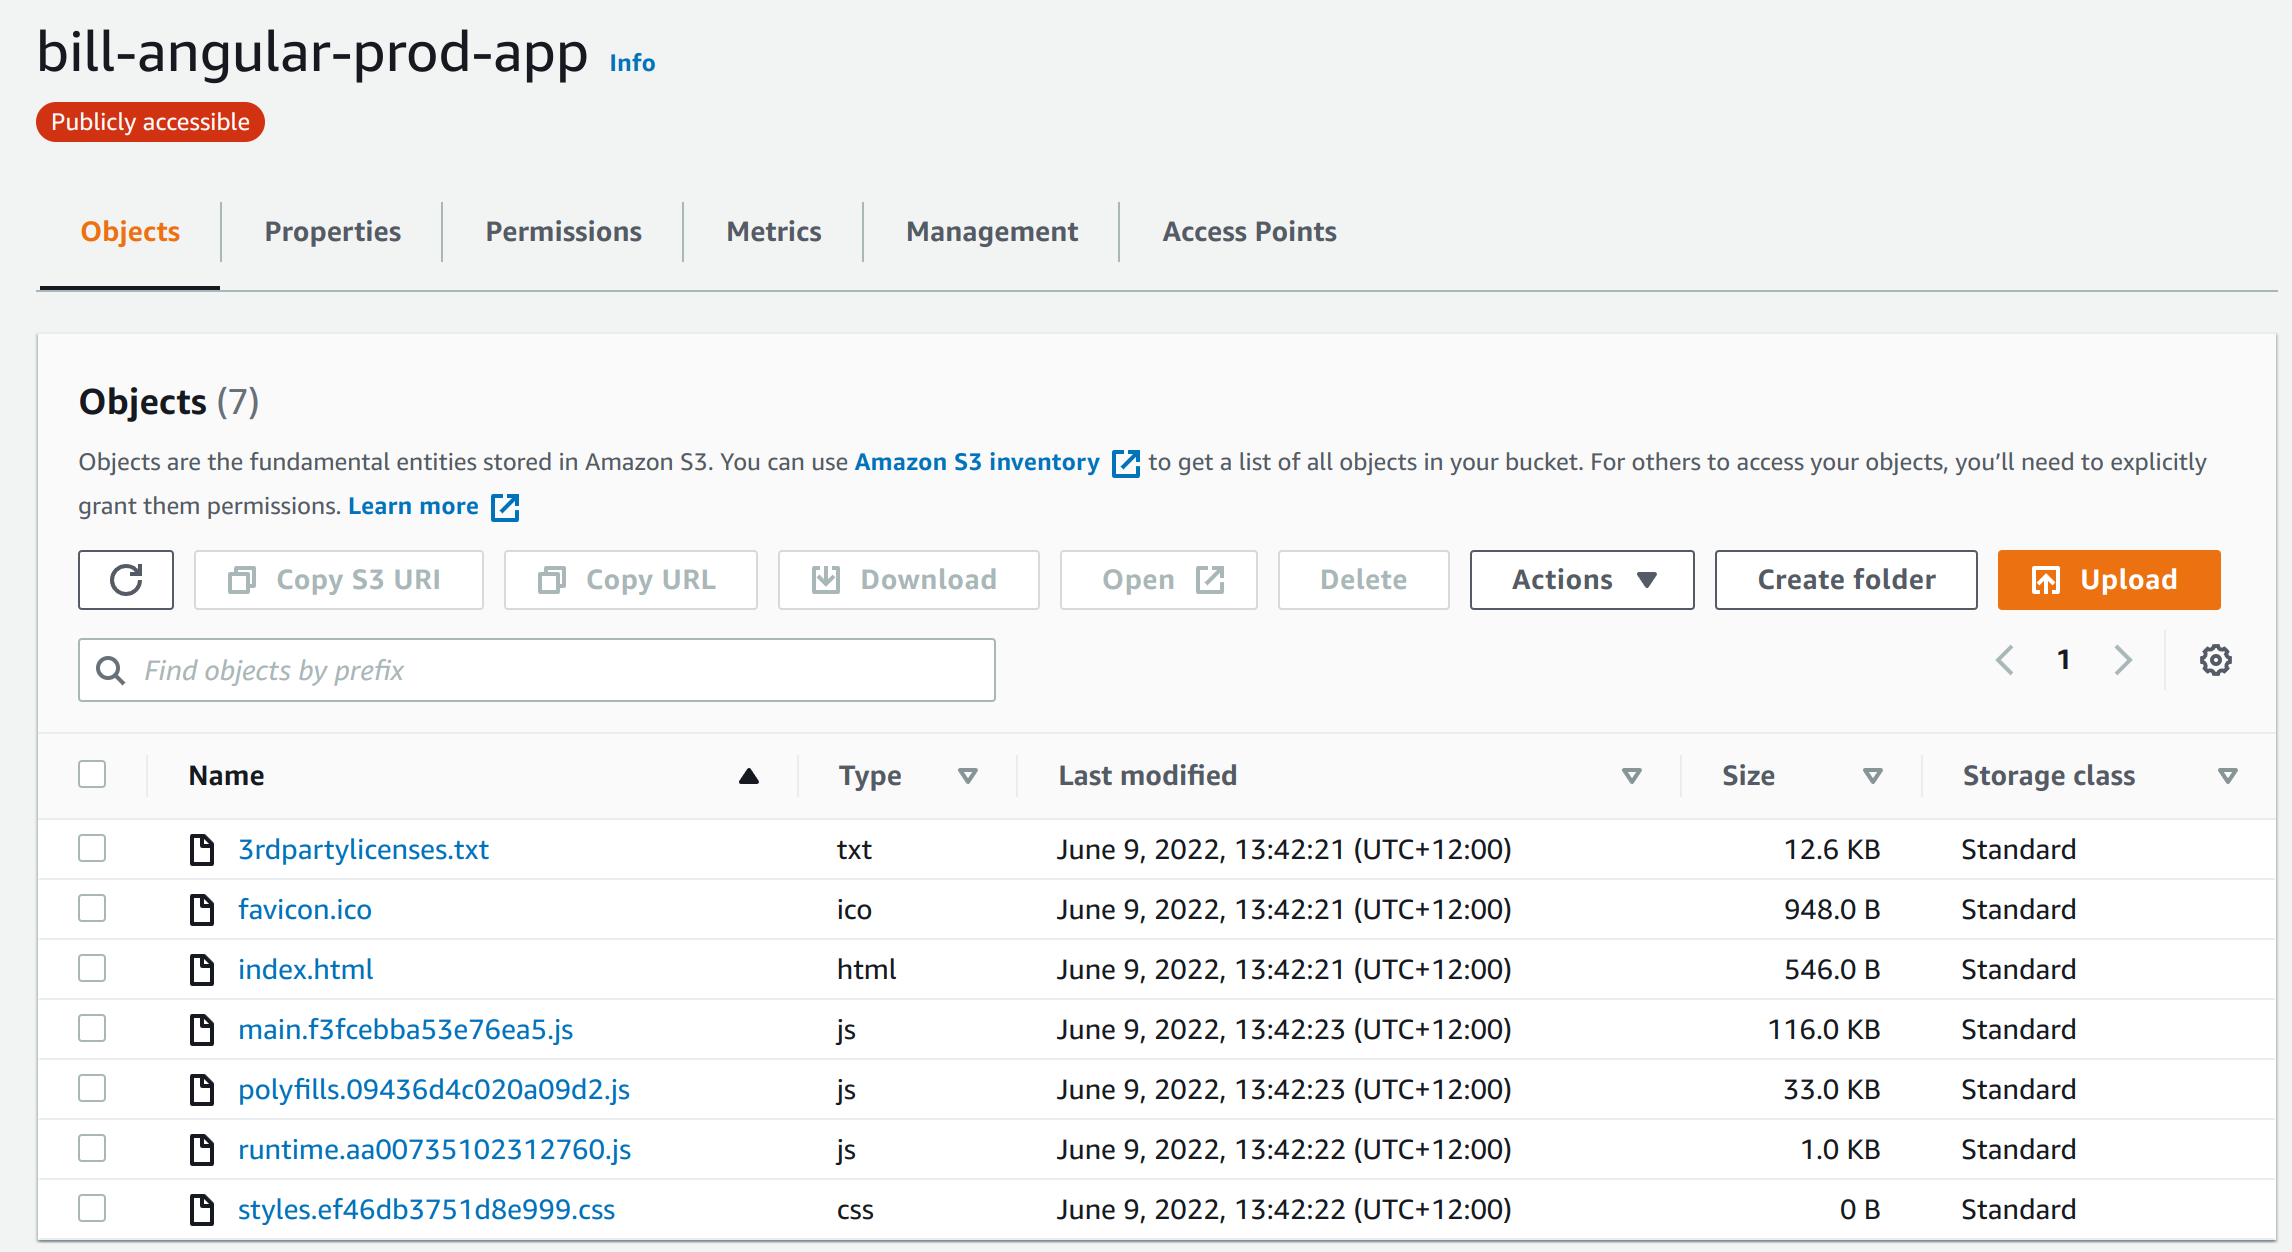
No issues here just point you upload folder. Here is a picture to help.

EKS Elastic Kubernetes Service
This is probably the better approach. AWS offer it's own Kubernetes which provides service on top of the standard offering. For this example I have used a sample project from GitHub to show the steps. This is end-to-end so includes parts not necessarily AWS.
- Install AWS CLI
- Clone Project
- Define Dockfile
- Build Docker Project
- Login to ecr (Elastic Container Registry)
- Create Repository
- Tag and Push Image
- Create Cluster Role
- Create Cluster
Install AWS CLI
Ezzy pezzy lemon Squezzy
curl "https://awscli.amazonaws.com/awscli-exe-linux-x86_64.zip" -o "awscliv2.zip"
unzip awscliv2.zip
sudo ./aws/install
Install eksctl
Ezzy pezzy lemon Squezzy 2
curl --silent --location "https://github.com/weaveworks/eksctl/releases/latest/download/eksctl_$(uname -s)_amd64.tar.gz" | tar xz -C /tmp
sudo mv /tmp/eksctl /usr/local/bin
Clone Project
Clone the project
git clone https://github.com/bbachi/angular-nginx-example.git
install Angular dependencies and start
cd my-app
npm install
npm start
</syntaxhightlight>
==Define Dockfile==
In the root of the clone, not my-app but the one before add a Dockerfile.
<syntaxhighlight lang="docker">

FROM node:10 AS ui-build
WORKDIR /usr/src/app
COPY my-app/ ./my-app/
RUN cd my-app && npm install @angular/cli && npm install && npm run build


FROM nginx:alpine

#!/bin/sh

COPY ./.nginx/nginx.conf /etc/nginx/nginx.conf

## Remove default nginx index page
RUN rm -rf /usr/share/nginx/html/*

# Copy from the stahg 1
COPY --from=ui-build /usr/src/app/my-app/dist/angular-nodejs-example/ /usr/share/nginx/html

EXPOSE 4200 80

ENTRYPOINT ["nginx", "-g", "daemon off;"]
Build Docker Project
You only need the first command, other commands for information only.
# build the image
docker build -t ang-nginx-ui .
# run the image
docker run -d --name ang-nginx-webapp -p 80:80 ang-nginx-ui
#list the image you just built
docker images
# list the container
docker ps
Login to ecr (Elastic Container Registry)
We are going to create a repository to store our container. This is the equivalent of dockerhub but an AWS version. Before doing this we need to authenticate. This can be done with the following.
aws ecr get-login-password --region ap-southeast-2 | docker login --username AWS --password-stdin aws_account_id.dkr.ecr.ap-southeast-2.amazonaws.com
The ap-southeast-2 is the region and the aws_account_id is the id from the console.
Create Repository
And to create the repository we can now do:
 aws ecr create-repository \
      --repository-name bill/angular-app \
      --image-scanning-configuration scanOnPush=true \
      --image-tag-mutability IMMUTABLE \
      --region ap-southeast-2
Tag and Push Image
First we tag the image with
docker tag ang-nginx-ui:latest aws_account_id.dkr.ecr.ap-southeast-2.amazonaws.com/bill/angular-app:v1
Now we can push the image as we would with dockerhub
docker push aws_account_id.dkr.ecr.ap-southeast-2.amazonaws.com/bill/angular-app:v1
Create Cluster Role
Next create the role to manage the cluster we do this with the following file and two commands (copied from docs [1])
{
  "Version": "2012-10-17",
  "Statement": [
    {
      "Effect": "Allow",
      "Principal": {
        "Service": "eks.amazonaws.com"
      },
      "Action": "sts:AssumeRole"
    }
  ]
}
 aws iam create-role --role-name eksBillClusterRole  --assume-role-policy-document file://"cluster-trust-policy.json"
 aws iam attach-role-policy --policy-arn arn:aws:iam::aws:policy/AmazonEKSClusterPolicy --role-name eksBillClusterRole
Create Cluster
To create the cluster I need to create a VPC. To do this I followed the documentation at [2]
For the cluster I again looked at the documentation [3] which showed the following command.
 aws eks create-cluster \
    --region ap-southeast-2 \
    --name bill-cluster \
    --kubernetes-version 1.22 \
    --role-arn arn:aws:iam::xxxxxxxxxxxxx:role/eksBillClusterRole \
    --resources-vpc-config subnetIds=subnet-xxxxxxxx,subnet-xxxxxxxxx,securityGroupIds=sg-xxxxxxx