AWS Angular and React Apps
Introduction
This page is about using AWS and Angular and how to provision the apps in AWS
S3
This is a easy approach for simple all in one app. I.E. no database or other communication. Steps to do this are
- Create a bucket
- Enable Web Static Hosting
- Grant Permissions
- Upload Bucket
Create Bucket
Nothing special except the naming of the bucket as it determines the URL of the app. So a bucket named bill-angular-prod-app will have a URL of http://bill-angular-prod-app.s3-website-ap-southeast-2.amazonaws.com where ap-southeast-2 is the region.
Enable Web Static Hosting
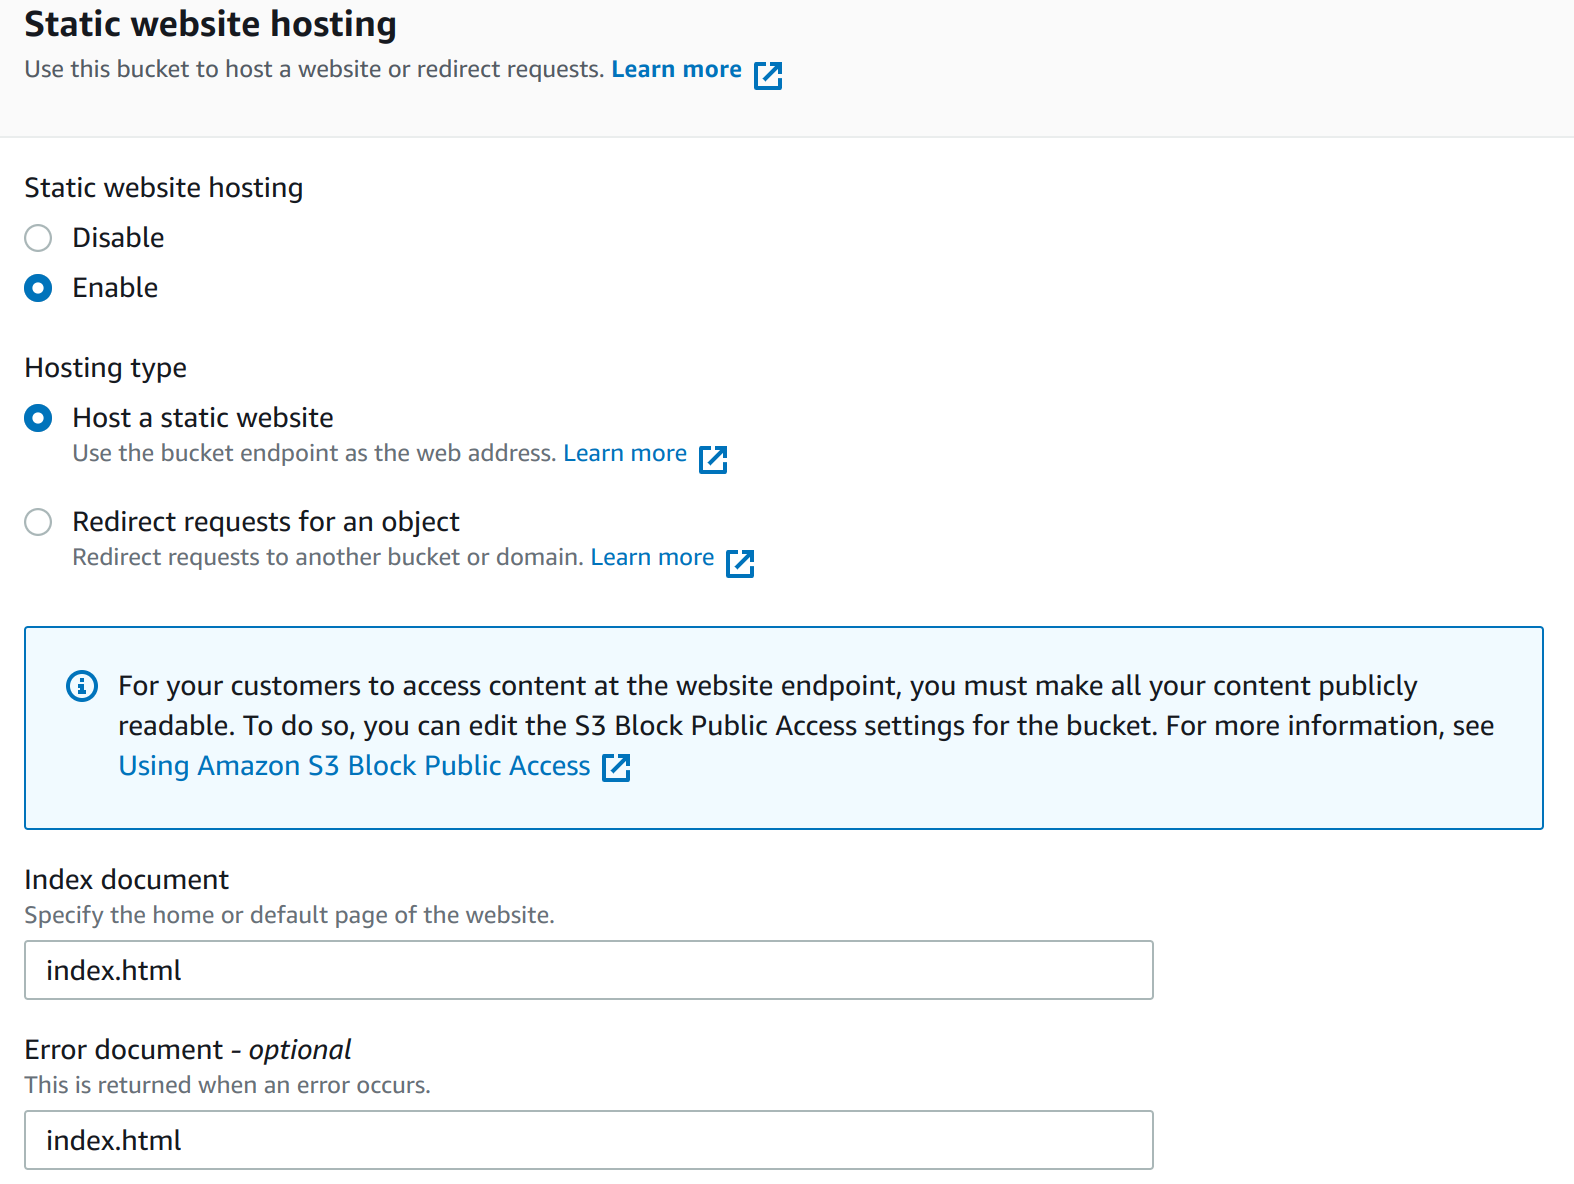
You will need to enable Static website hosting under properties for this to work and set the index and error document.

Grant Permissions
To allow public access you will need to disable Block public access which is on by default. Additionally you will need to add a Bucket policy. I did not have permission for mine but was able to on another account.
{
    "Version": "2012-10-17",
    "Statement": [
        {
            "Sid": "AddPermission",
            "Effect": "Allow",
            "Principal": "*",
            "Action": "s3:GetObject",
            "Resource": "arn:aws:s3:::bill-angular-prod-app/*"
        }
    ]
}
Upload Bucket
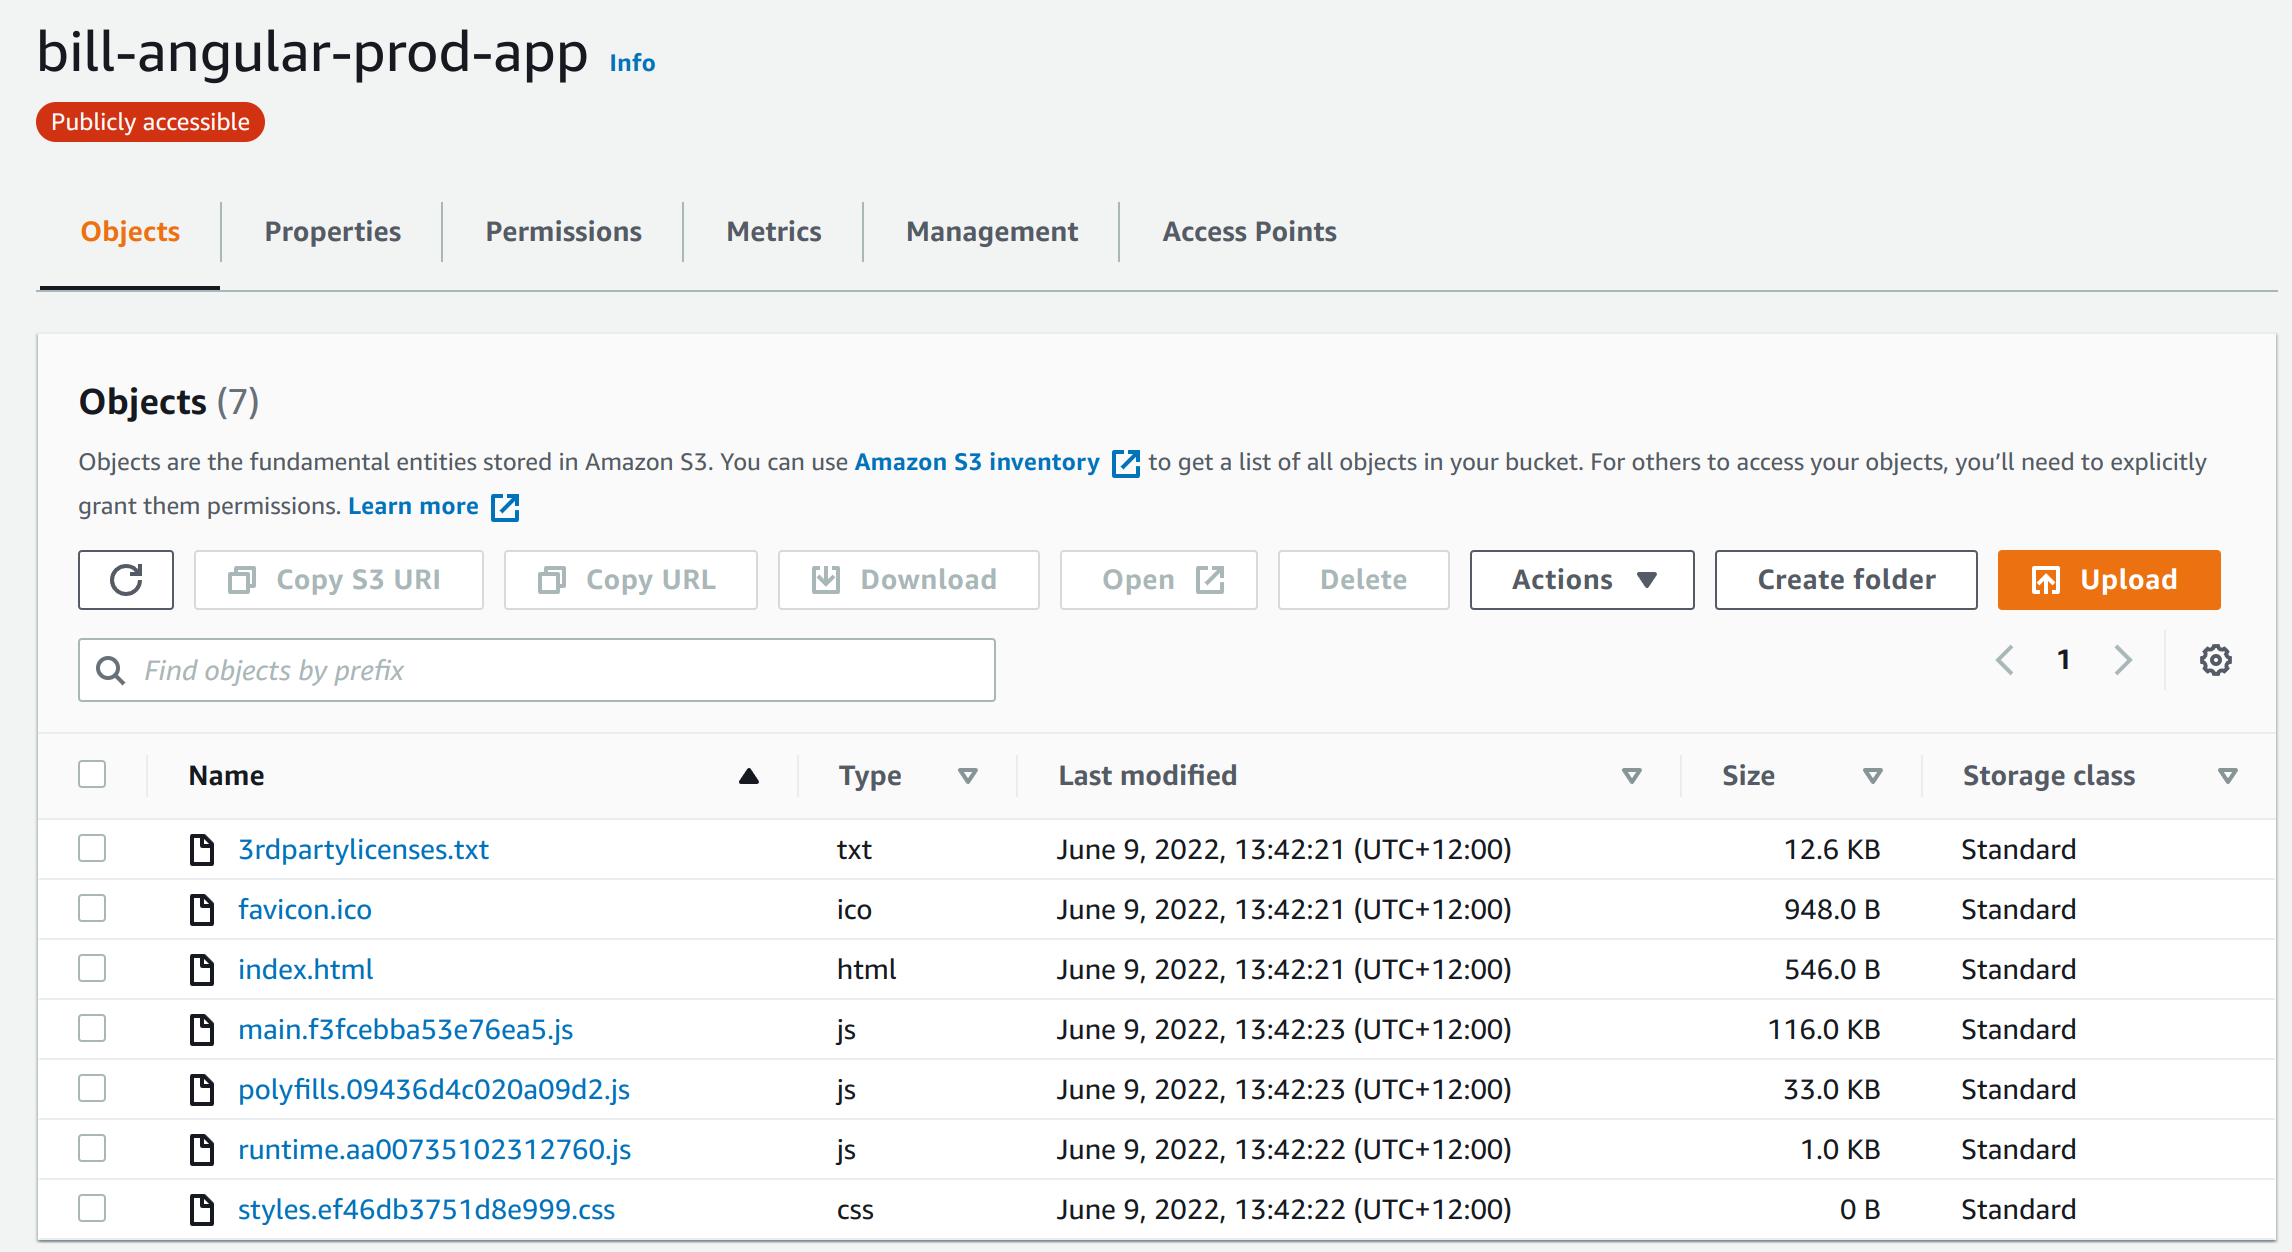
No issues here just point you upload folder. Here is a picture to help.

EKS Elastic Kubernetes Service
This is probably the better approach. AWS offer it's own Kubernetes which provides service on top of the standard offering. For this example I have used a sample project from GitHub to show the steps. This is end-to-end so includes parts not necessarily AWS.
- Prerequisites
- Create key pair
- Install AWS CLI
- Install eksctl
- Install kubectl
- Install aws-iam-authenticator
- AWS CLI and MFA
- Create Test Project
- Clone Project
- Build Project
- Dockerize Project
- Define Dockfile
- Build Docker Project
- Store Docker Image
- Login to ecr (Elastic Container Registry)
- Create Repository
- Tag and Push Image
- Create Cluster
- Create Cluster Role
- Create Cluster
- Add VPC CNI
- Update Cluster config
- Create Node Group
- Create Managed Node IAM Role
- Create Managed Node Group
- Perform Deoloyment
Prerequisites
Create Key Pair
We need this when creating node groups.
aws ec2 create-key-pair \
    --key-name bills-key-pair \
    --key-type rsa \
    --key-format pem \
    --query "KeyMaterial" \
    --output text > bills-key-pair.pem
Install AWS CLI
Ezzy pezzy lemon Squezzy
curl "https://awscli.amazonaws.com/awscli-exe-linux-x86_64.zip" -o "awscliv2.zip"
unzip awscliv2.zip
sudo ./aws/install
Install eksctl
Ezzy pezzy lemon Squezzy 2
curl --silent --location "https://github.com/weaveworks/eksctl/releases/latest/download/eksctl_$(uname -s)_amd64.tar.gz" | tar xz -C /tmp
sudo mv /tmp/eksctl /usr/local/bin
Install kubectl
Ezzy pezzy lemon Squezzy 3
sudo apt-get install -y apt-transport-https ca-certificates curl
sudo curl -fsSLo /usr/share/keyrings/kubernetes-archive-keyring.gpg https://packages.cloud.google.com/apt/doc/apt-key.gpg
echo "deb [signed-by=/usr/share/keyrings/kubernetes-archive-keyring.gpg] https://apt.kubernetes.io/ kubernetes-xenial main" | sudo tee /etc/apt/sources.list.d/kubernetes.list
sudo apt-get update
sudo apt-get install -y kubectl
Install aws-iam-authenticator
For me ~/bin is already in the path
curl -o aws-iam-authenticator https://s3.us-west-2.amazonaws.com/amazon-eks/1.21.2/2021-07-05/bin/linux/amd64/aws-iam-authenticator
chmod +x ./aws-iam-authenticator
mkdir -p $HOME/bin && cp ./aws-iam-authenticator $HOME/bin/aws-iam-authenticator && export PATH=$PATH:$HOME/bin
echo 'export PATH=$PATH:$HOME/bin' >> ~/.bashrc
AWS CLI and MFA
This was possibly the thing that took the most time. Not clearly specified with the error message so here is how you do it.
- Get MFA Device Number (MFA_NUM)
- Get Code from Device (CODE_FROM_MFA)
- Get Values for environment variables
- Set config and credential files
Get MFA Device Number (MFA_NUM)
We need to get this number to use in subsequent steps.
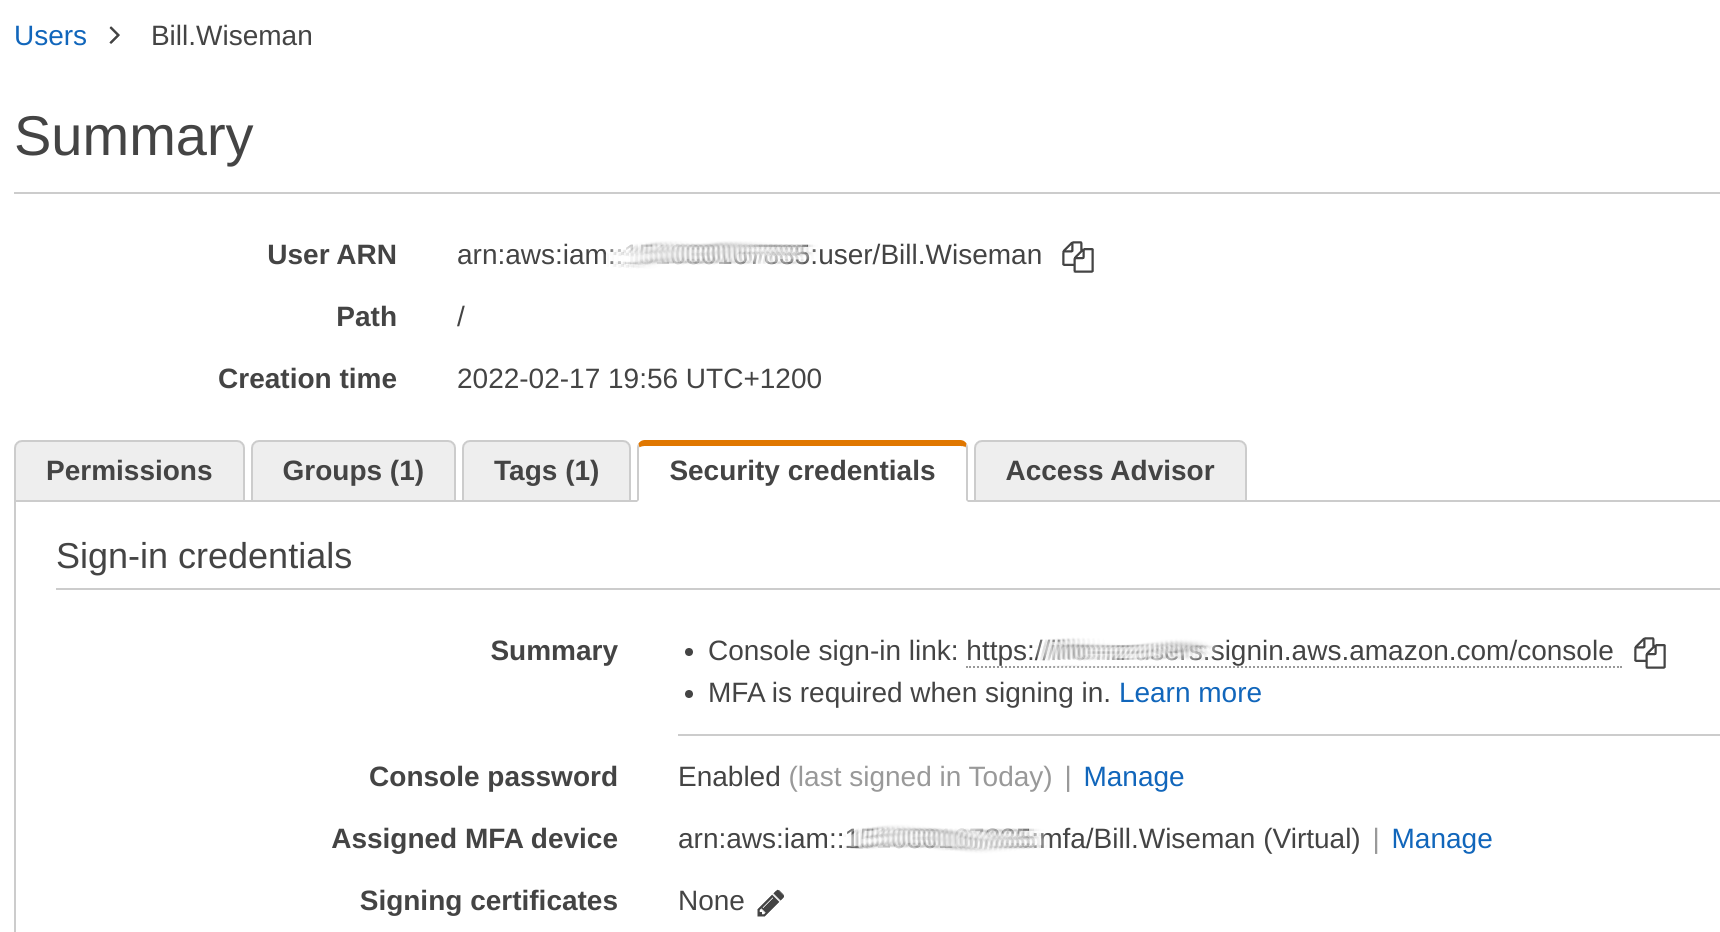
MFA_NUM is the number of the MFA device on your AWS profile.

We can also do this with the following command. Note to get the MFA device you will use the <username> AWS_PROFILE not <username>-dev mentioned later
aws iam list-mfa-devices --user-name <username>
Get Code from Device (CODE_FROM_MFA)
The is the code you use when you sign into the console.
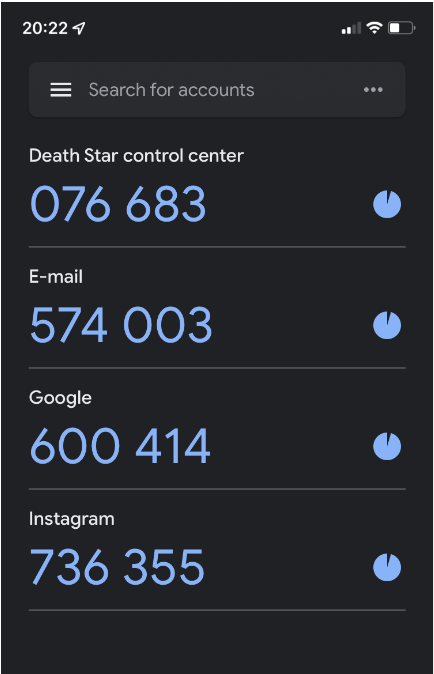
CODE_FROM_MFA is taken from the authenticator app

Get Values for environment variables
We need to have the three environment variables. aws_access_key_id, aws_secret_access_key, aws_session_token. These are used in .aws/config and .aws/credentials. To get the values use the following command.
aws sts get-session-token --serial-number MFA_NUM --token-code CODE_FROM_MFA
This returns
{
    "Credentials": {
        "AccessKeyId": blahblah_ID,
        "SecretAccessKey": blahblah_KEY,
        "SessionToken": blahblah_TOKEN,
        "Expiration": "2019-07-12T01:14:07Z"
    }
}
Set config and credential files
For using the AWs cli we have .aws/config and .aws/credentials.
.aws/credentials:
[mfa]
aws_access_key_id = ID_FROM_ABOVE
aws_secret_access_key = KEY_FROM_ABOVE
aws_session_token = TOKEN_FROM_ABOVE
.aws/config:
[mfa]
output = json
region = us-east-1

[profile secondaccount]
role_arn = arn:aws:iam::<SECOND_ACCOUNT_ID>:role/admin
source_profile = mfa
Finally
export AWS_PROFILE=secondaccount
Now when running
aws sts get-caller-identity
Should return the assumed role.
Here is my current exmample
[mfa]
aws_access_key_id=ASxxxxxxxxxxxxxxxxxx
aws_secret_access_key=JYxxxxxxxxxxxxxxxxxxxxxxxxxxxxxxxxxxxxxx
aws_session_token=xxxxxxxxxxxxxxxxxxxxxxxxxxxxxxxxxxxxxxxxxxxxxxxxxxxxxxxxxxxxxxxxxxxxxxxxxxxxxxxxxxxxxxxxxxxxxxxxxxxxxxxxxxxxxxxxxxxxxxxxxxxxxxxxxxxxxxxxxxxxxxxxxxxxxxxxxxxxxxxxxxxxxxxxxxxxxxxxxxxxxxxxxxxxxxxxxxxxxxxxxxxxxxxxxxxxxxxxxxxxxxxxxxxxxxxxxxxxxxxxxxxxxxxxxxxxxxxxxxxxxxxxxxxxxxxxxxxxxxxxxxxxxxxxxxxxxxxxxxxxxxxxxxxxxxxxxxxxxxxxxxxxxxxxxxxxxxxxxxxxxxxxxxxxxxxxxxxxxxxxxxxxxxxxxxxxxxxxxxxxxxxxxxxxxxxxxxxxxxxxxxxxxxxxxxxxxxxxxxxxxxxxxxxxxxxxxxxxxxxxxxxxxxxxxxxxxxxxxxxxxxxxxxxxxxxxxxxxxxxxxxxxxxxxxxxxxxxxxxxxxxxxxxxxxxxxxxxxxxxxxxxxxxxxxxxxxxxxxxxxxxxxxxxxxxxxxxxxxxxxxxxxxxxxxxxxxxxxxxxxxxxxxxxxxxxxxxxxxxxxxxxxxxxxxxxxxxxxxxxxxxxxxxxxxxxxxxxxxxxxxxxxxxxxxxxxxxxxxxxxxxxxxxxxxxxxxxxxxxxxxxxxxxxxxxxxxxxxxxxxxxxx0=

[fred.bloggs-dev]
role_arn=arn:aws:iam::xxxxxxxxxxxx:role/Administrator
source_profile = mfa
Create Test Angular Project
Clone Project
Clone the project
git clone https://github.com/bbachi/angular-nginx-example.git
Build Project
install Angular dependencies and start
cd my-app
npm install
npm start
Create Test React Project
Create React Project
npx create-react-app test-app --template typescript
Build Project
install React dependencies and start
cd test-app
npm install
npm start
Dockerize Project
Define Dockfile
In the root of the clone, not my-app but the one before add a Dockerfile.
FROM node:10 AS ui-build
WORKDIR /usr/src/app
COPY my-app/ ./my-app/
RUN cd my-app && npm install @angular/cli && npm install && npm run build


FROM nginx:alpine

#!/bin/sh

COPY ./.nginx/nginx.conf /etc/nginx/nginx.conf

## Remove default nginx index page
RUN rm -rf /usr/share/nginx/html/*

# Copy from the stahg 1
COPY --from=ui-build /usr/src/app/my-app/dist/angular-nodejs-example/ /usr/share/nginx/html

EXPOSE 4200 80

ENTRYPOINT ["nginx", "-g", "daemon off;"]
Build Docker Project
You only need the first command, other commands for information only.
# build the image
docker build -t ang-nginx-ui .
# run the image
docker run -d --name ang-nginx-webapp -p 80:80 ang-nginx-ui
#list the image you just built
docker images
# list the container
docker ps
Store Docker Image
Login to ecr (Elastic Container Registry)
We are going to create a repository to store our container. This is the equivalent of dockerhub but an AWS version. Before doing this we need to authenticate. This can be done with the following.
aws ecr get-login-password --region ap-southeast-2 | docker login --username AWS --password-stdin aws_account_id.dkr.ecr.ap-southeast-2.amazonaws.com
The ap-southeast-2 is the region and the aws_account_id is the id from the console.
Create Repository
And to create the repository we can now do:
 aws ecr create-repository \
      --repository-name bill/angular-app \
      --image-scanning-configuration scanOnPush=true \
      --image-tag-mutability IMMUTABLE \
      --region ap-southeast-2
Tag and Push Image
First we tag the image with
docker tag ang-nginx-ui:latest aws_account_id.dkr.ecr.ap-southeast-2.amazonaws.com/bill/angular-app:v1
Now we can push the image as we would with dockerhub
docker push aws_account_id.dkr.ecr.ap-southeast-2.amazonaws.com/bill/angular-app:v1
Create Cluster
Create Cluster Role
Next create the role to manage the cluster we do this with the following file and two commands (copied from docs [1])
{
  "Version": "2012-10-17",
  "Statement": [
    {
      "Effect": "Allow",
      "Principal": {
        "Service": "eks.amazonaws.com"
      },
      "Action": "sts:AssumeRole"
    }
  ]
}
 aws iam create-role --role-name eksBillsClusterRole  --assume-role-policy-document file://"cluster-trust-policy.json"
 aws iam attach-role-policy --policy-arn arn:aws:iam::aws:policy/AmazonEKSClusterPolicy --role-name eksBillsClusterRole
Create Cluster
To create the cluster I need to create a VPC. To do this I followed the documentation at [2]
For the cluster I again looked at the documentation [3] which showed the following command.
 aws eks create-cluster \
    --region ap-southeast-2 \
    --name bills-cluster \
    --kubernetes-version 1.22 \
    --role-arn arn:aws:iam::xxxxxxxxxxxxx:role/eksBillsClusterRole \
    --resources-vpc-config subnetIds=subnet-xxxxxxxx,subnet-xxxxxxxxx,securityGroupIds=sg-xxxxxxx
Add VPC CNI
This is required otherwise
aws eks create-addon \
    --cluster-name bills-cluster \
    --addon-name vpc-cni \
    --addon-version v1.11.0-eksbuild.1 \
    --service-account-role-arn arn:aws:iam::xxxxxxxxx:role/eksBillsClusterRole \
    --resolve-conflicts OVERWRITE
Update Cluster config
This command creates a .kube/config for the cluster
aws eks update-kubeconfig --name bills-cluster
Create Node
Create Managed Node IAM Role
We need to create a role for our nodes we do this with the following file and commands
{
  "Version": "2012-10-17",
  "Statement": [
    {
      "Effect": "Allow",
      "Principal": {
        "Service": "ec2.amazonaws.com"
      },
      "Action": "sts:AssumeRole"
    }
  ]
}
 aws iam create-role \
   --role-name AmazonEKSNodeRole \
   --assume-role-policy-document file://"node-role-trust-relationship.json"
 aws iam attach-role-policy \
   --policy-arn arn:aws:iam::aws:policy/AmazonEKSWorkerNodePolicy \
   --role-name AmazonEKSNodeRole
  aws iam attach-role-policy \
    --policy-arn arn:aws:iam::aws:policy/AmazonEC2ContainerRegistryReadOnly \
    --role-name AmazonEKSNodeRole
  aws iam attach-role-policy \
     --policy-arn arn:aws:iam::aws:policy/AmazonEKS_CNI_Policy \
     --role-name AmazonEKSNodeRole
Create Managed Node Group
Now we can create the managed node group. Make sure you have created a key pair and cluster first.
 eksctl create nodegroup \
   --cluster bills-cluster \
   --region ap-southeast-2 \
   --name bills-mng \
   --node-type m5.large \
   --nodes 3 \
   --nodes-min 2 \
   --nodes-max 4 \
   --ssh-access \
   --ssh-public-key bills-key
The above would not work so used
 aws eks create-nodegroup \
   --cluster bills-cluster \
   --region ap-southeast-2 \
   --nodegroup-name bills-mng \
   --scaling-config minSize=2,maxSize=2,desiredSize=2 \
   --instance-types t3.medium \
   --subnets subnet-xxxxxxxxxx subnet-xxxxxxxxxx subnet-xxxxxxxxxx subnet-xxxxxxxxxx \
   --node-role arn:aws:iam::xxxxxxxx:role/AmazonEKSNodeRole
Perform Depoloyment
Finally we can use Kubernetes and deploy our application. Remember to specify the image name. Sample manifest shown below
apiVersion: apps/v1
kind: Deployment
metadata:
  creationTimestamp: null
  labels:
    app: nginx-webapp
  name: nginx-webapp
spec:
  replicas: 5
  selector:
    matchLabels:
      app: nginx-webapp
  strategy: {}
  template:
    metadata:
      creationTimestamp: null
      labels:
        app: nginx-webapp
    spec:
      containers:
      - image: xxxxxxxxxx.dkr.ecr.ap-southeast-2.amazonaws.com/bill/angular-app:v1
        name: webapp
        imagePullPolicy: Always
        resources: {}
        ports:
          - containerPort: 80
status: {}

---

apiVersion: v1
kind: Service
metadata:
  name: nginx-webapp
  labels:
    run: nginx-webapp
spec:
  ports:
  - port: 80
    protocol: TCP
  selector:
    app: nginx-webapp
  type: LoadBalancer
And to run the deployment we use
kubectl create -f manifest.yaml
Now we can the pods running with
kubectl get pods
Which shows
 NAME                            READY   STATUS    RESTARTS   AGE
 nginx-webapp-65f7f6bd98-6vss6   1/1     Running   0          7m13s
 nginx-webapp-65f7f6bd98-8tbp9   1/1     Running   0          7m13s
 nginx-webapp-65f7f6bd98-c2t2l   1/1     Running   0          7m13s
 nginx-webapp-65f7f6bd98-ph6nl   1/1     Running   0          7m13s
 nginx-webapp-65f7f6bd98-wgmgf   1/1     Running   0          7m12s
And the service with
kubectl get svc
Which shows
 NAME           TYPE           CLUSTER-IP       EXTERNAL-IP                                                                   PORT(S)        AGE
 kubernetes     ClusterIP      10.100.0.1       <none>                                                                        443/TCP        49m
 nginx-webapp   LoadBalancer   10.100.124.152   xxxxxxxxxxxxxxxxxxxxxxxxxxxxxxxxxxxxxxxxxx.ap-southeast-2.elb.amazonaws.com   80:30493/TCP   9m12s
Get Node External IP
When you use resources external to the cluster you may need to find the external IP of the node. To do this
kubectl get nodes -o wide
 NAME                                                 STATUS   ROLES    AGE    VERSION               INTERNAL-IP       EXTERNAL-IP    OS-IMAGE         KERNEL-VERSION
 CONTAINER-RUNTIME
 ip-192-168-XXX-XXX.ap-southeast-2.compute.internal   Ready    <none>   114d   v1.22.6-eks-7d68063   192.168.XXX.XXX   <none>         Amazon Linux 2   5.4.190-107.353.amzn2.x86_64   docker://20.10.13
 ip-192-168-XX-XX.ap-southeast-2.compute.internal     Ready    <none>   114d   v1.22.6-eks-7d68063   192.168.XX.XX     XX.XXX.XXX.X   Amazon Linux 2   5.4.190-107.353.amzn2.x86_64   docker://20.10.13
Remove EKS Elastic Kubernetes Service
To delete the deployment
kubectl delete deployment nginx-webapp
kubectl delete svc nginx-webapp
To delete the node group
 eksctl delete nodegroup \
   --cluster bills-cluster \
   --region ap-southeast-2 \
   --name bills-mng
To delete the cluster
aws eks delete-cluster --name bills-cluster --region ap-southeast-2
Certificate Management
This has not been tried at this time but is here as a backport.
I followed the instructions on https://github.com/aws-samples/end-to-end-encryption-on-amazon-eks
Get Cert Manager Tool
This provides a command line tool to manager certificates
curl -L -o kubectl-cert-manager.tar.gz https://github.com/cert-manager/cert-manager/releases/download/v1.0.4/kubectl-cert_manager-linux-amd64.tar.gz
tar xzf kubectl-cert-manager.tar.gz
sudo mv kubectl-cert_manager /usr/local/bin
We can do some basic management from the cli
kubectl get certificate

NAME                   READY   SECRET         AGE
test-app-certificate   True    test-app-tls   135d
kubectl cert-manager renew test-app-certificate
Create Issuer
You will need to create a role and some bits in Route 53
apiVersion: cert-manager.io/v1
kind: ClusterIssuer
metadata:
  name: letsencrypt-cluster-issuer
spec:
  acme:
    server: https://acme-v02.api.letsencrypt.org/directory
    email: iwiseman@bibble.co.nz
    privateKeySecretRef:
      name: letsencrypt-cluster-issuer-key
    solvers:
    - dns01:
        route53:
          region: ap-southeast-2
          hostedZoneID: Zxxxx
          role: arn:aws:iam::xxxx0:role/xxxxx
      selector:
        dnsZones:
          - "npe-test-app.example.co.nz"
Create Certificate
apiVersion: cert-manager.io/v1
kind: Certificate
metadata:
  name: test-app-certificate
  namespace: default
spec:
  dnsNames:
    - npe-test-app.example.co.nz
  secretName: test-app-tls
  issuerRef:
    name: letsencrypt-cluster-issuer
    kind: ClusterIssuer
Virtual Server
Once we have a certificate we can make are virtual server
apiVersion: k8s.nginx.org/v1
kind: VirtualServer
metadata:
  name: test-app-virtualserver
spec:
  host: npe-test-app.example.co.nz
  tls:
    secret: test-app-tls
    redirect:
      enable: true
  routes:
  - path: /
    route: test-app-virtualserverroute
Virtual Server Routes
Now we make the routes
apiVersion: k8s.nginx.org/v1
kind: VirtualServerRoute
metadata:
  name: test-app-virtualserverroute
spec:
  host: npe-test-app.example.co.nz
  upstreams:
  - name: test-app-web-route
    service: test-app-web-service
    port: 443
    tls:
      enable: true
  - name: test-app-api-route
    service: test-app-api-service
    port: 3016
    tls:
      enable: true
  - name: test-app-tasks-route
    service: test-app-tasks-service
    port: 3017
    tls:
      enable: true
  subroutes:
  - path: /api
    action:
      pass: test-app-api-route
  - path: /tasks
    action:
      pass: test-app-tasks-route
  - path: /
    action:
      pass: test-app-web-route
Web
We create a pod with the code and a service to provide access to the cluster
Web Pod
Web Service
apiVersion: v1
kind: Service
metadata:
  name: test-app-web-service
  labels:
    app: test-app
spec:
  ports:
    - port: 443
      targetPort: 443
      protocol: TCP
      name: https
  selector:
    app: test-app
  type: NodePort
Tasks
Task Pod
apiVersion: apps/v1
kind: Deployment
metadata:
  name: test-app-tasks-deploy
  labels:
    app: test-app-tasks
spec:
  replicas: 1
  selector:
    matchLabels:
      app: test-app
  template:
    metadata:
      labels:
        app: test-app
    spec:
      containers:
        - name: test-app-tasks-container
          image: xxxx-blah.example.co.nz/test/test-app-tasks:0.0.8
          ports:
            - containerPort: 3017
          env:
          - name: TEST_APP_TASKS_VERSION
            value: "v0.0.1"
          - name: TEST_APP_TASKS_PREFIX
            value: "tasks"
          - name: TEST_APP_TASKS_PORT
            value: "3017"

          - name: KEY_PEM
            value: "/etc/test-app-tasks/ssl/tls.key"
          - name: KEY_CERT
            value: "/etc/test-app-tasks/ssl/tls.crt"

          volumeMounts:

            - name: test-app-tasks-vol-tls
              mountPath: /etc/test-app-tasks/ssl
              readOnly: true

      volumes:
        - name: test-app-tasks-vol-tls
          secret:
            secretName: test-app-tls
Task Service
apiVersion: v1
kind: Service
metadata:
  name: test-app-tasks-service
  labels:
    app: test-app
spec:

  ports:
    - name: tasks
      port: 3017
      targetPort: 3017

  selector:
    app: test-app
  type: LoadBalancer
External Database
This is an example of how to have access to a Postgres Database.
kind: Service
apiVersion: v1
metadata:
  name: test-app-postgres-service
  labels:
    app: test-app
spec:
  type: ExternalName
  externalName: test-app-blahblah.ap-southeast-2.rds.amazonaws.com  // Endpoint in AWS for the database
  ports:
    -
      name: "postgres"
      protocol: "TCP"
      port: 5432
      targetPort: 5432