Android Layouts: Difference between revisions
| Line 19: | Line 19: | ||
This allows you to put a layout on top of another. E.g. you want of put text on top of a picture. | This allows you to put a layout on top of another. E.g. you want of put text on top of a picture. | ||
[[File:Android FrameLayout.png|600px]] | [[File:Android FrameLayout.png|600px]] | ||
==Coordinated== | ==Coordinated Layout== | ||
Intended for two primary use cases | Intended for two primary use cases | ||
*As a top level application decor or chrome-layout | *As a top level application decor or chrome-layout | ||
| Line 30: | Line 30: | ||
[[File:Andrroid Callapsing.png|200px]] | [[File:Andrroid Callapsing.png|200px]] | ||
[[File:Android Collapsing2.png|200px]] | [[File:Android Collapsing2.png|200px]] | ||
==Constraint Layout== | ==Constraint Layout== | ||
*Released in 2016 | *Released in 2016 | ||
Revision as of 11:13, 5 January 2021
Introduction
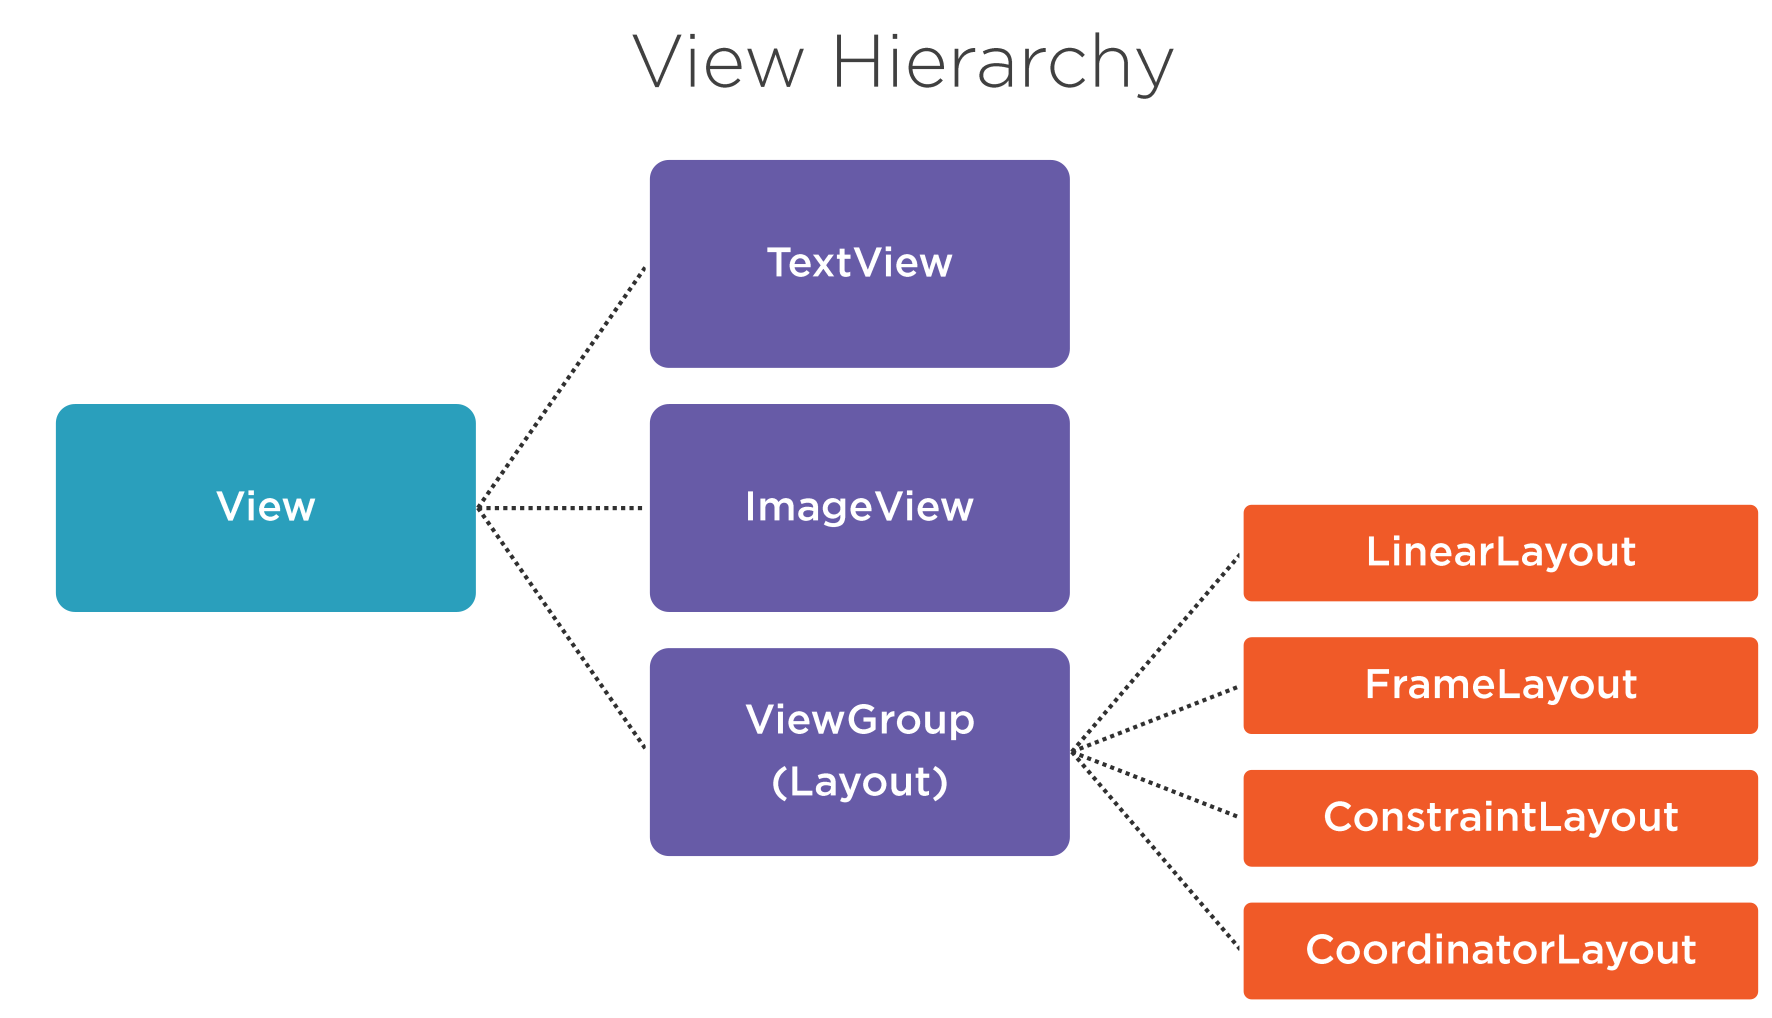
View Hierarchy can be split into types types
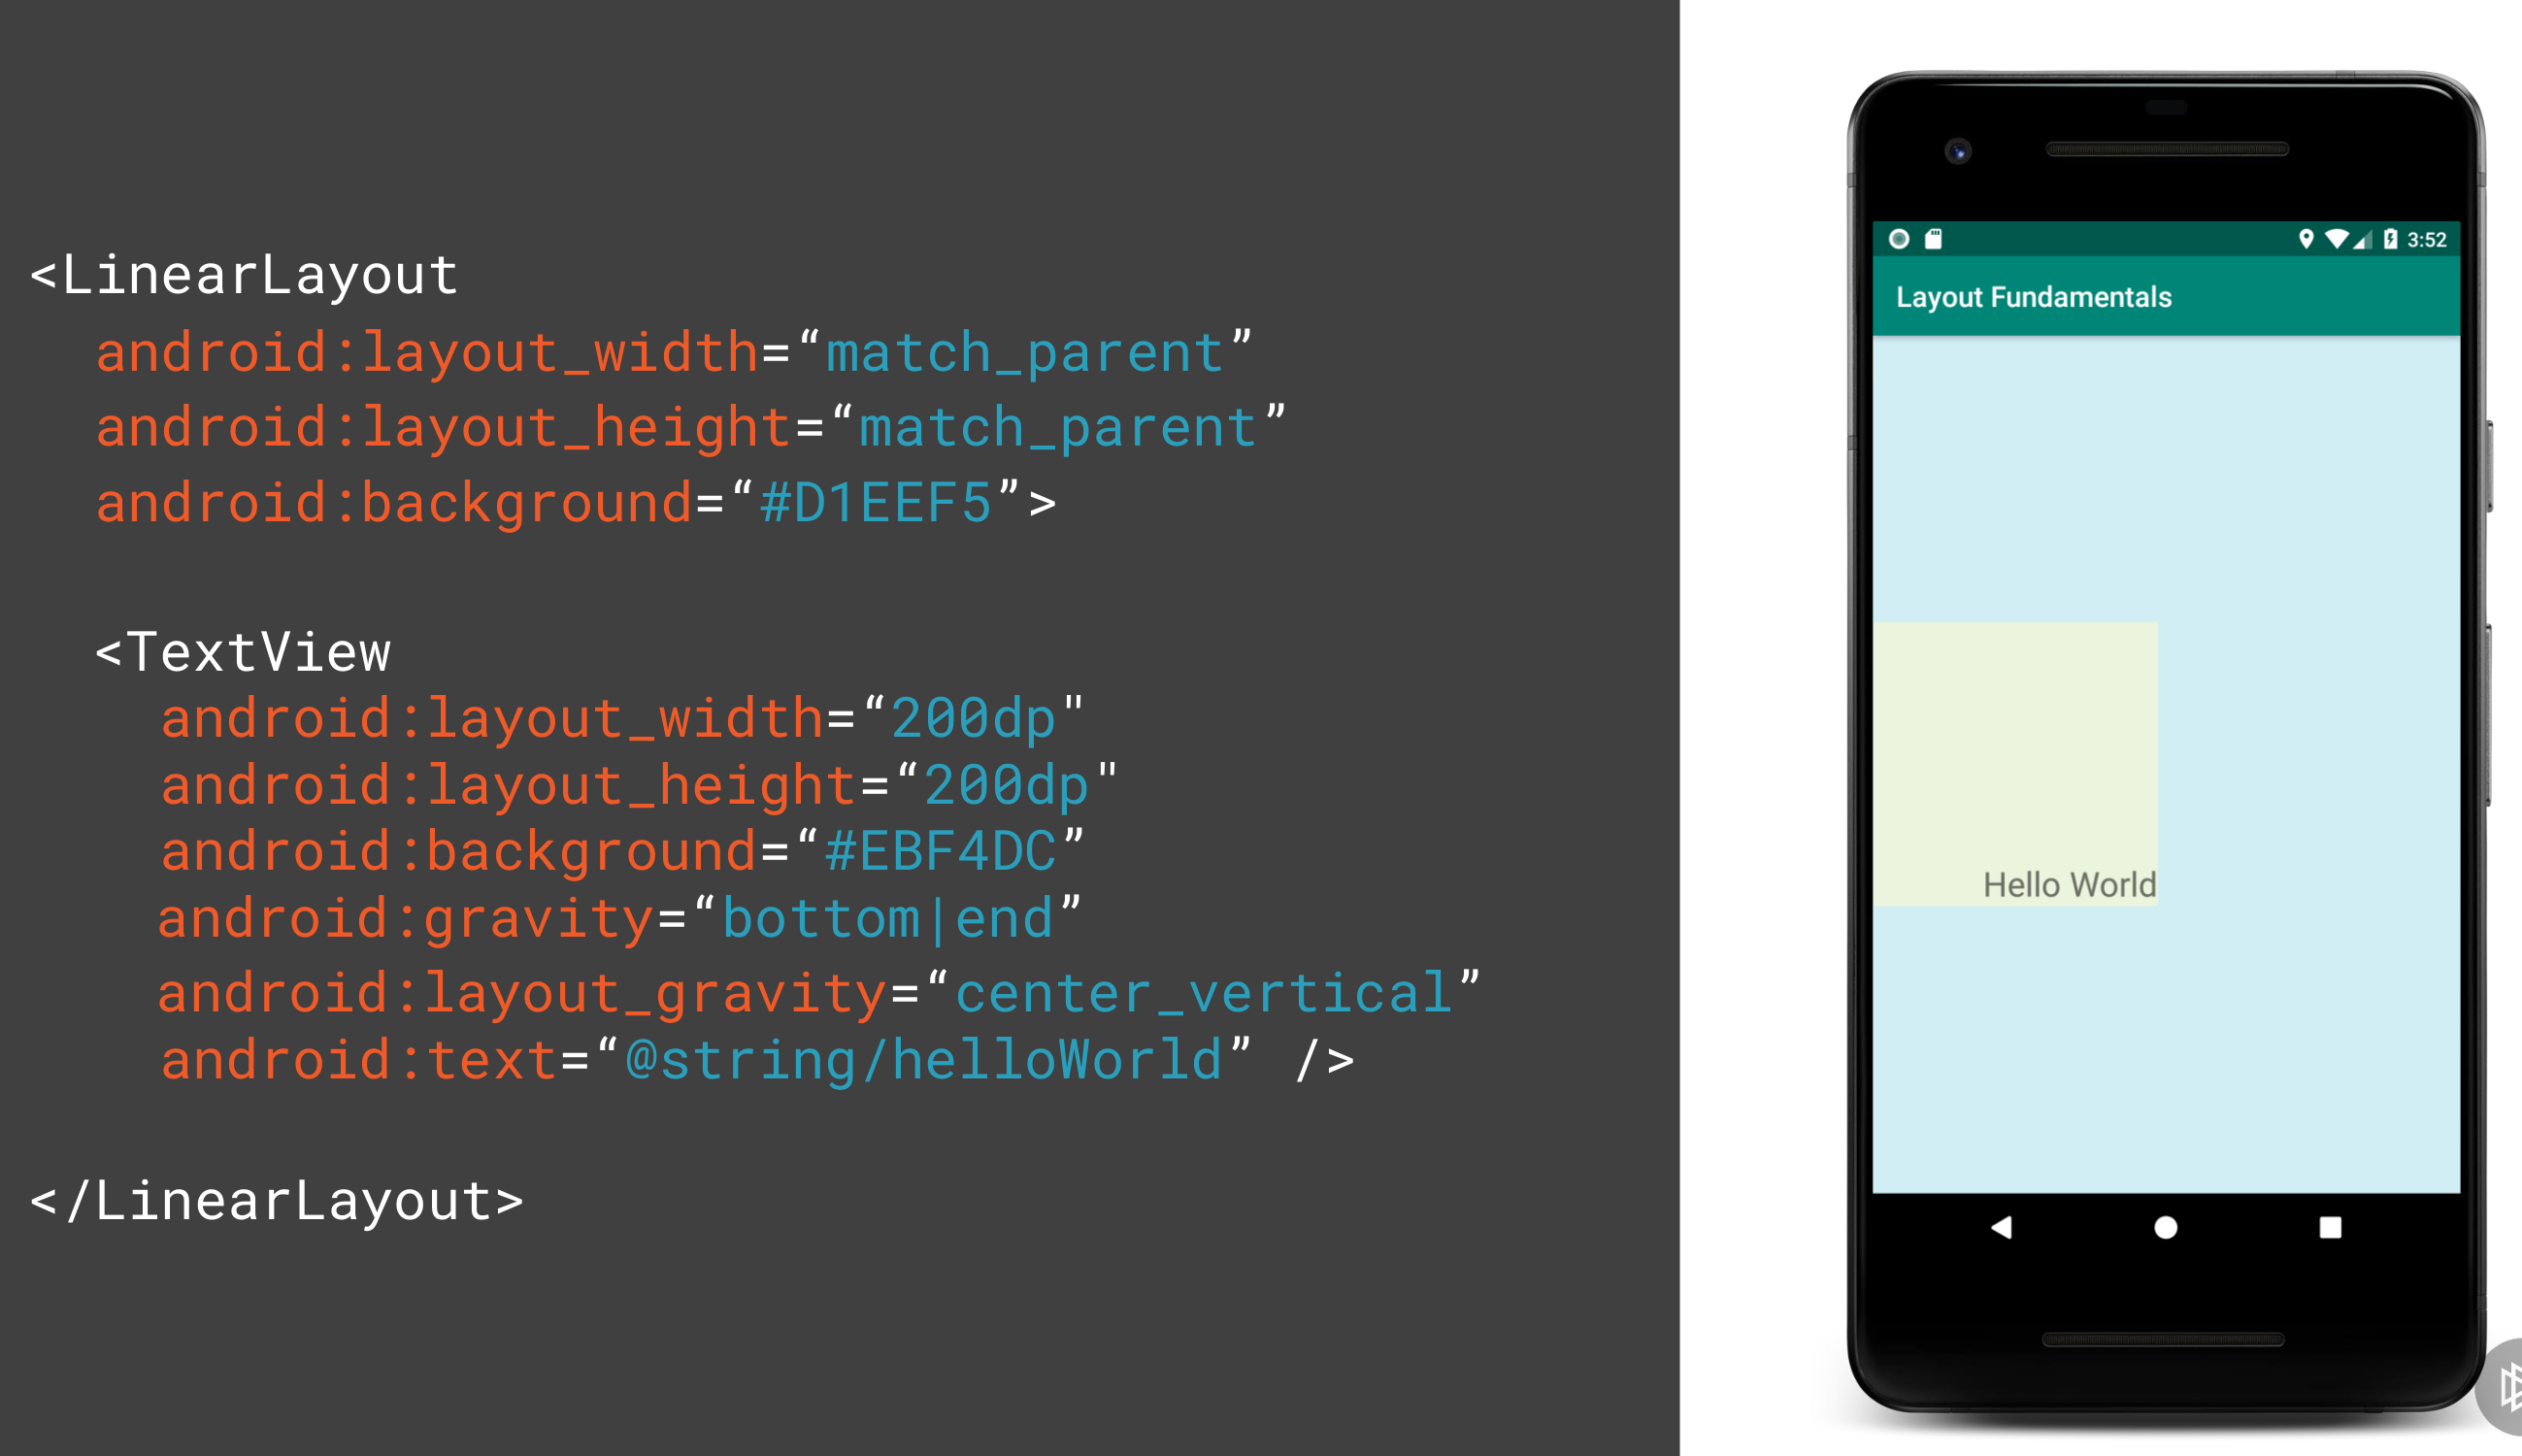
- Margin is the space around the widget
- Padding is the space within the widget
- Gravity is the position of the widget within the widget its self
- Layout Gravity is the position of the widget within its parent
Here shows the difference between layout_gravity and gravity.
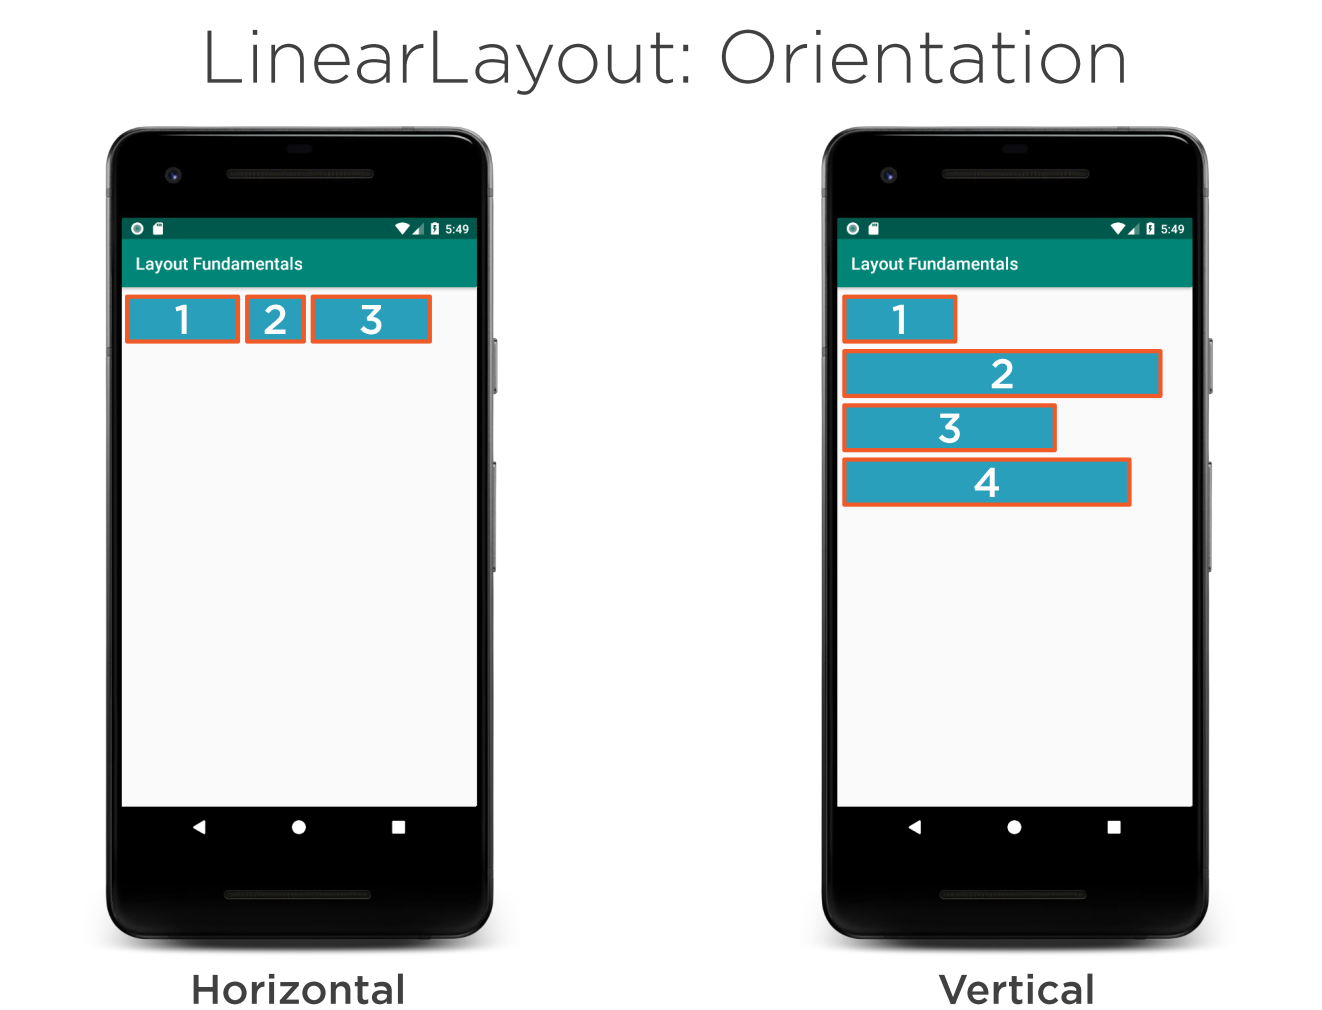
Layouts
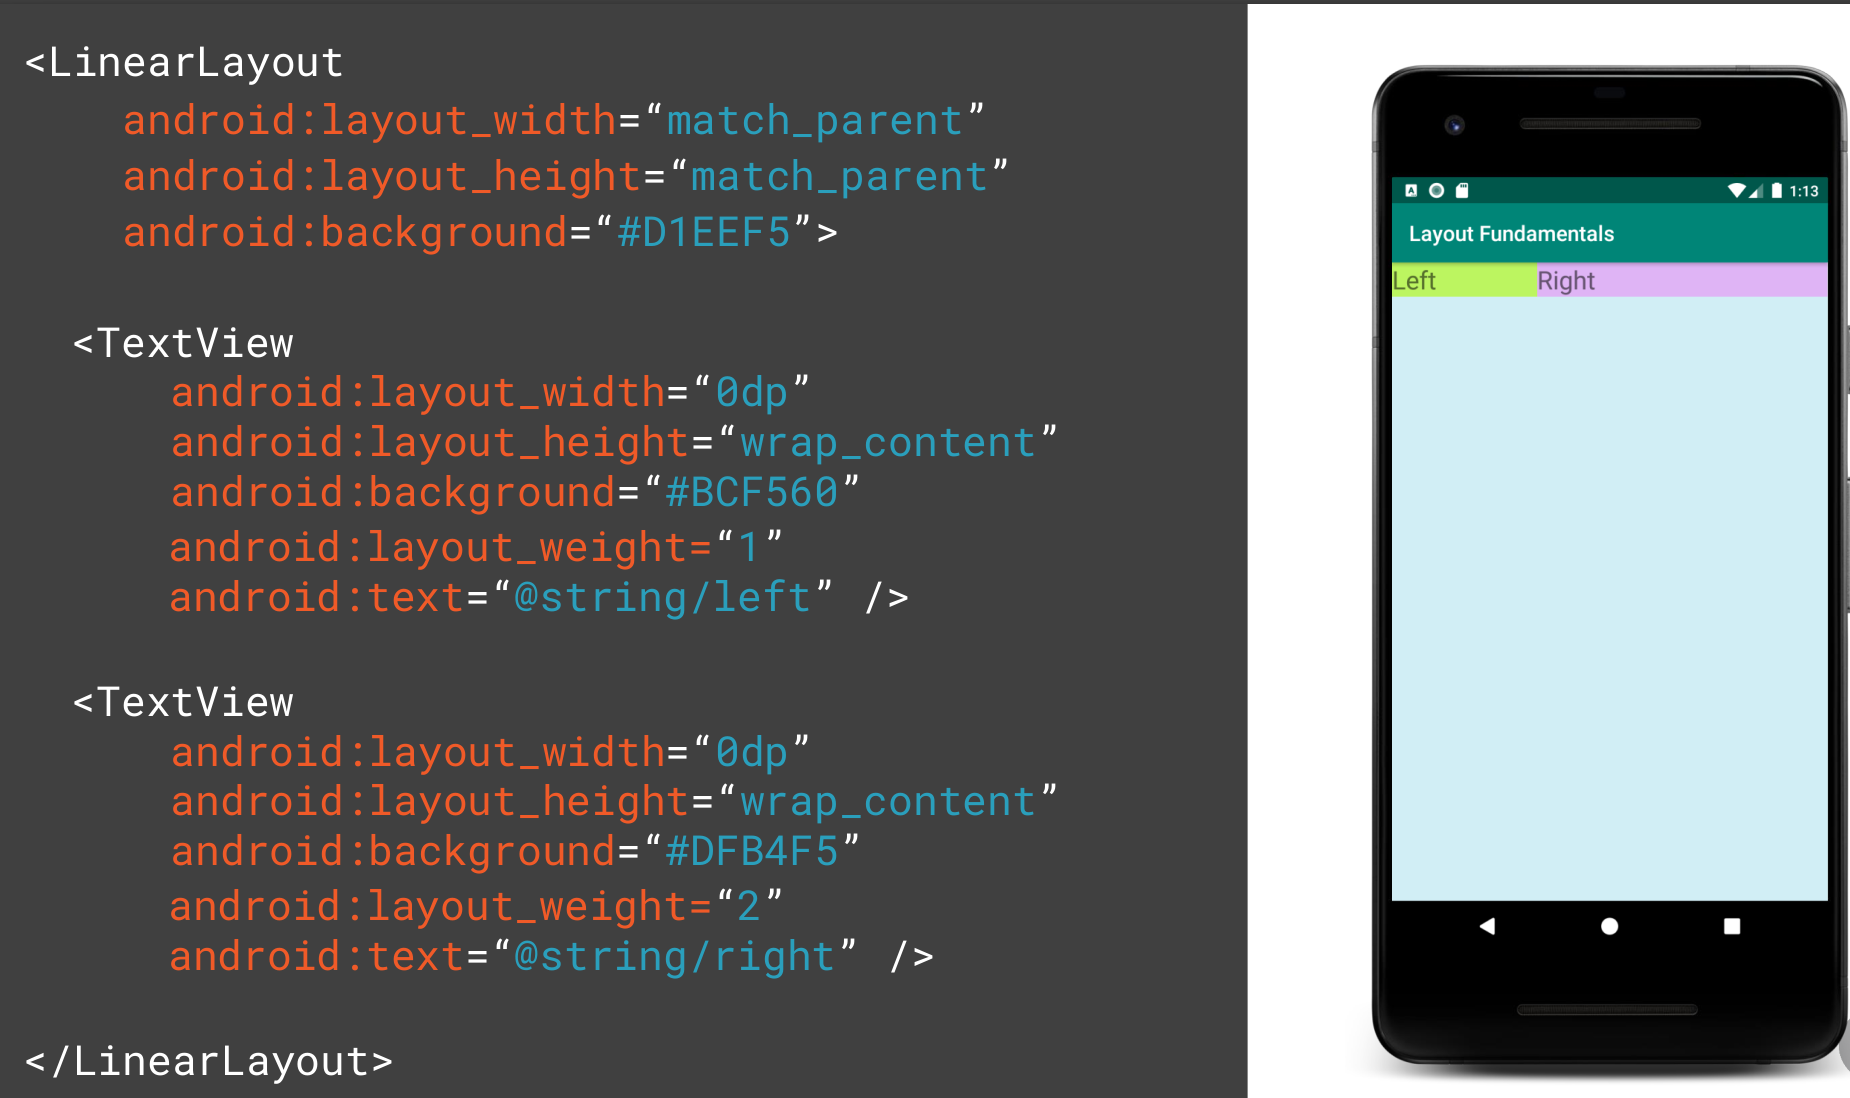
Linear
These are like rows and columns in flex box. Items are wapped.
Weight
Weight determines the distribution of the widgets when no width or height is provided. Here the weight adds up to 3 and therefore the ratio is 1:2
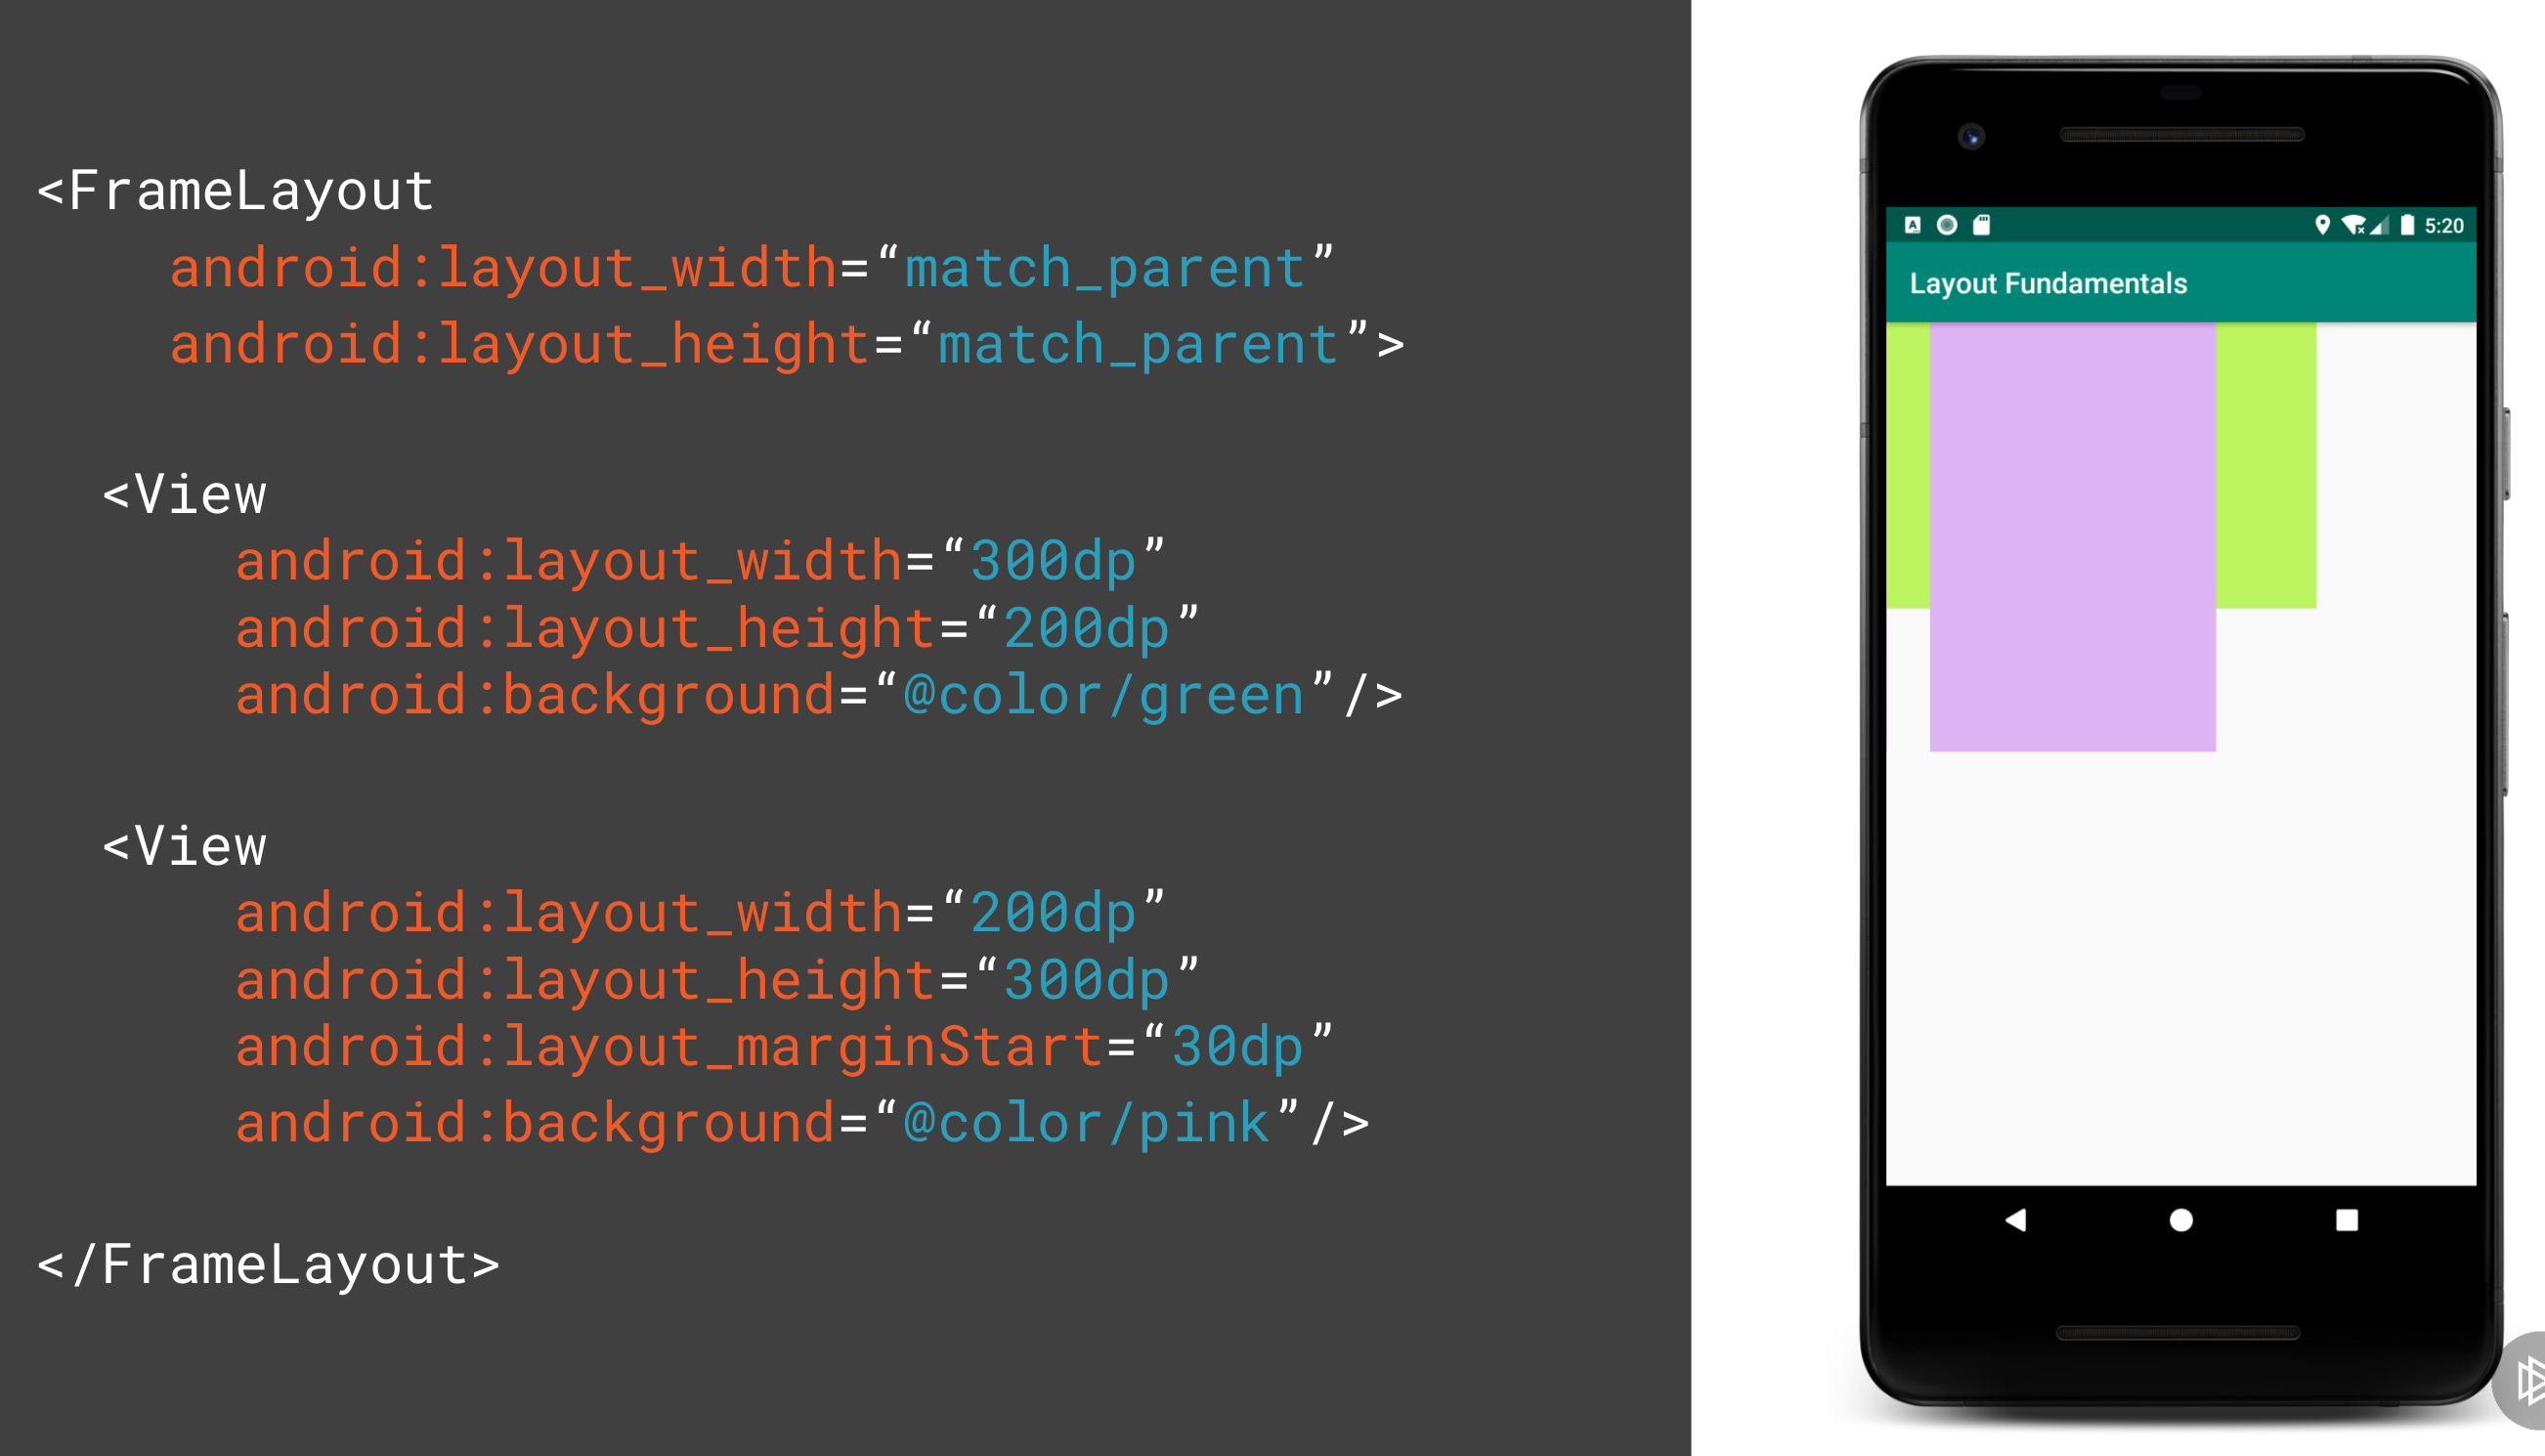
FrameLayout
This allows you to put a layout on top of another. E.g. you want of put text on top of a picture.
Coordinated Layout
Intended for two primary use cases
- As a top level application decor or chrome-layout
- As a container for a specific interaction
- With its child views
- Between its child views
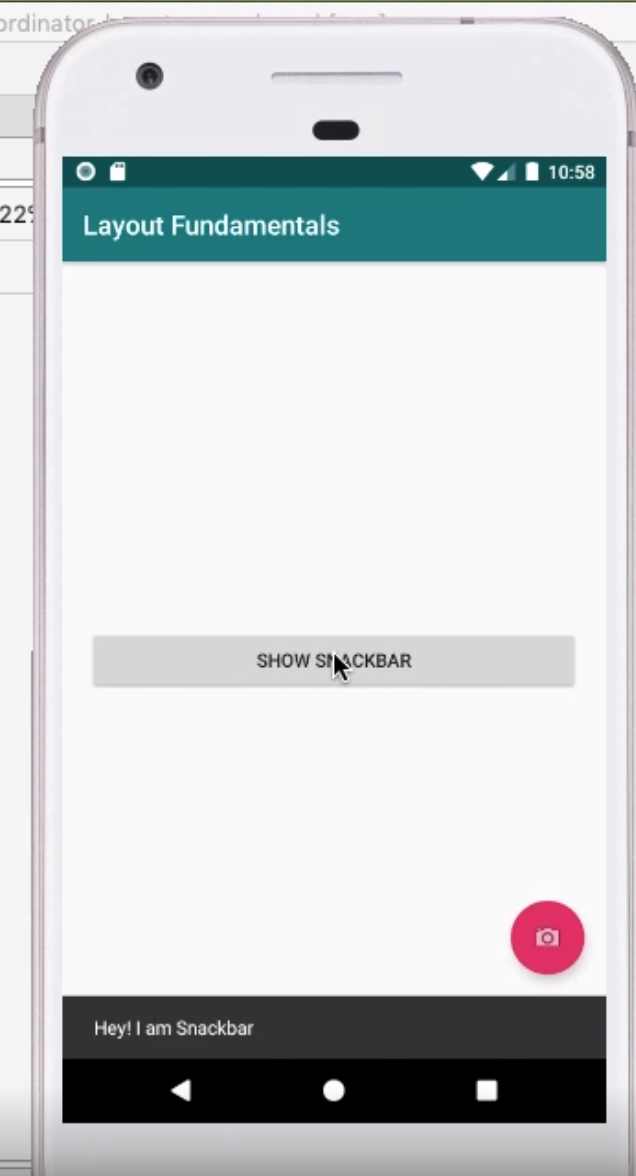
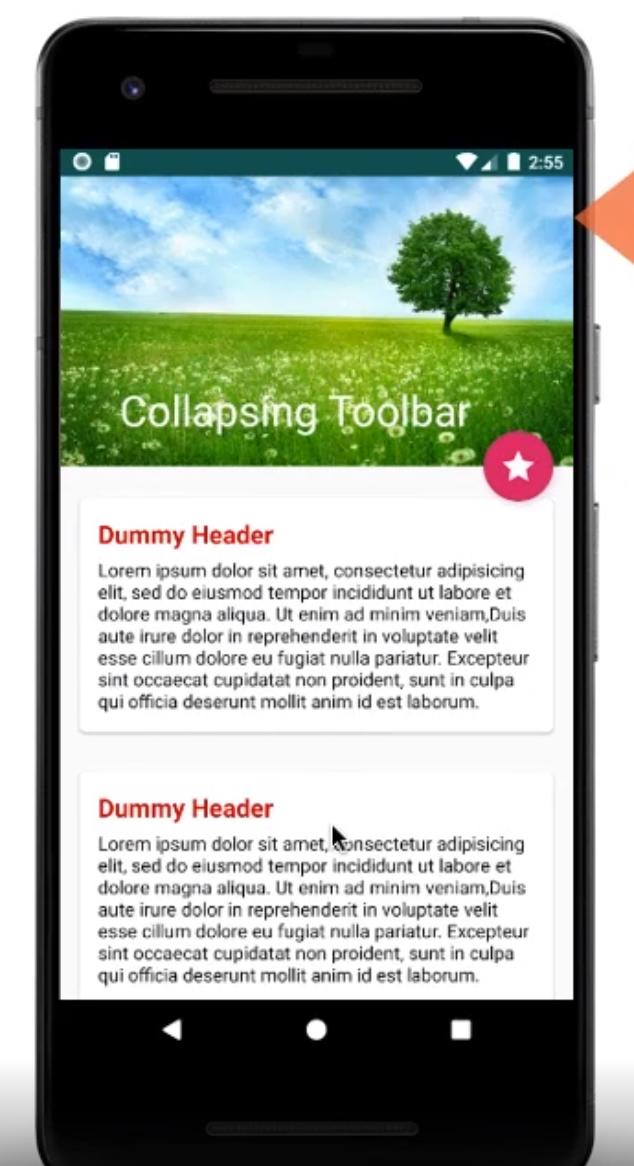
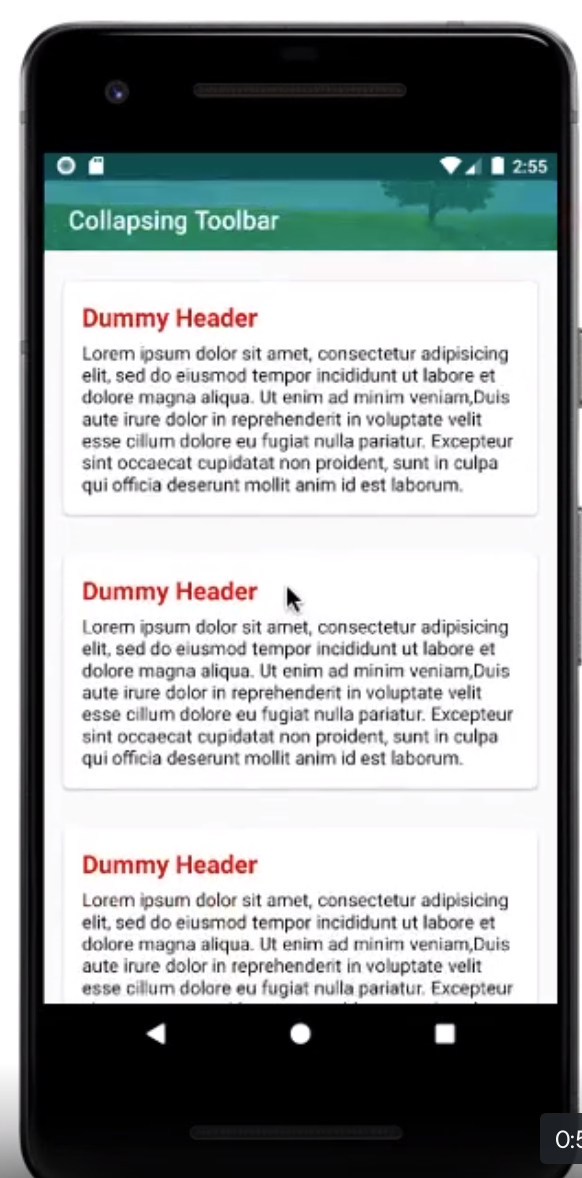
This can be used as parent which will allow other components such as the FAB button to move when the SnackBar appears. The example of collapsing toolbar was very impressive.
Constraint Layout
- Released in 2016
- Compatible with API 9+
- Can be used for animations
- Flat hierarchy so no nested layouts (better performance)
- Provides relative positioning
- You can use drag and drop in Visual Studio
When you use android studio you can convert existing layouts in the component tree by right clicking. This does not always work but is an option
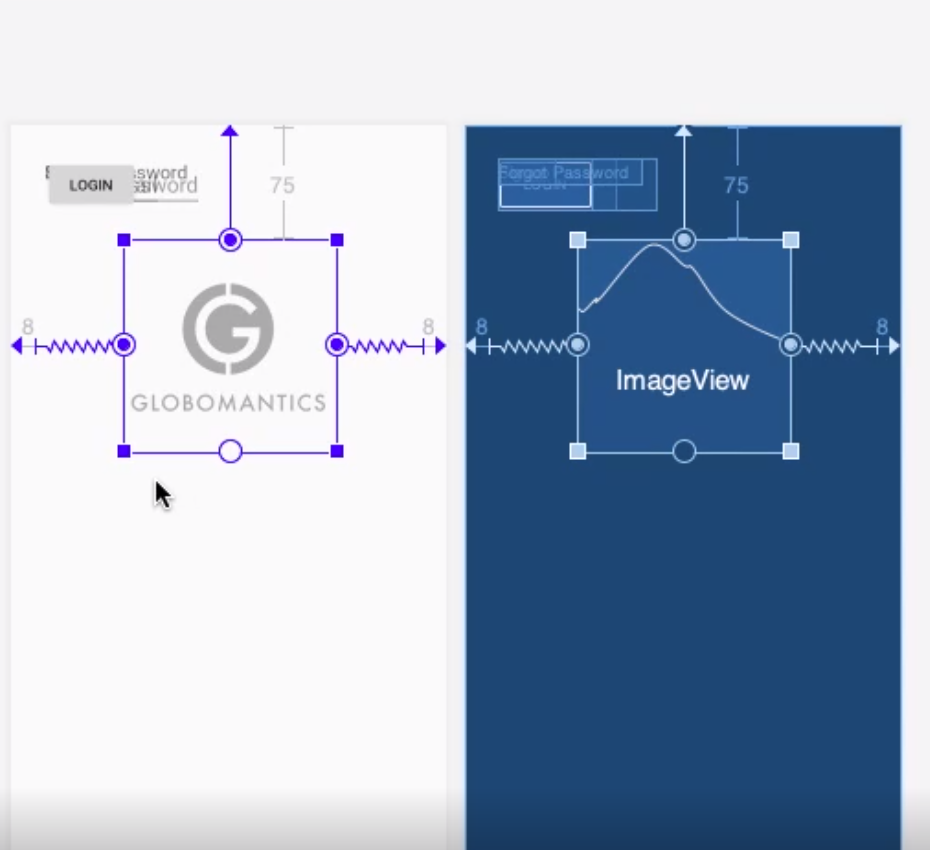
By using the Android Studio Editor you can drag the constraints to the sides so constrain the widget.
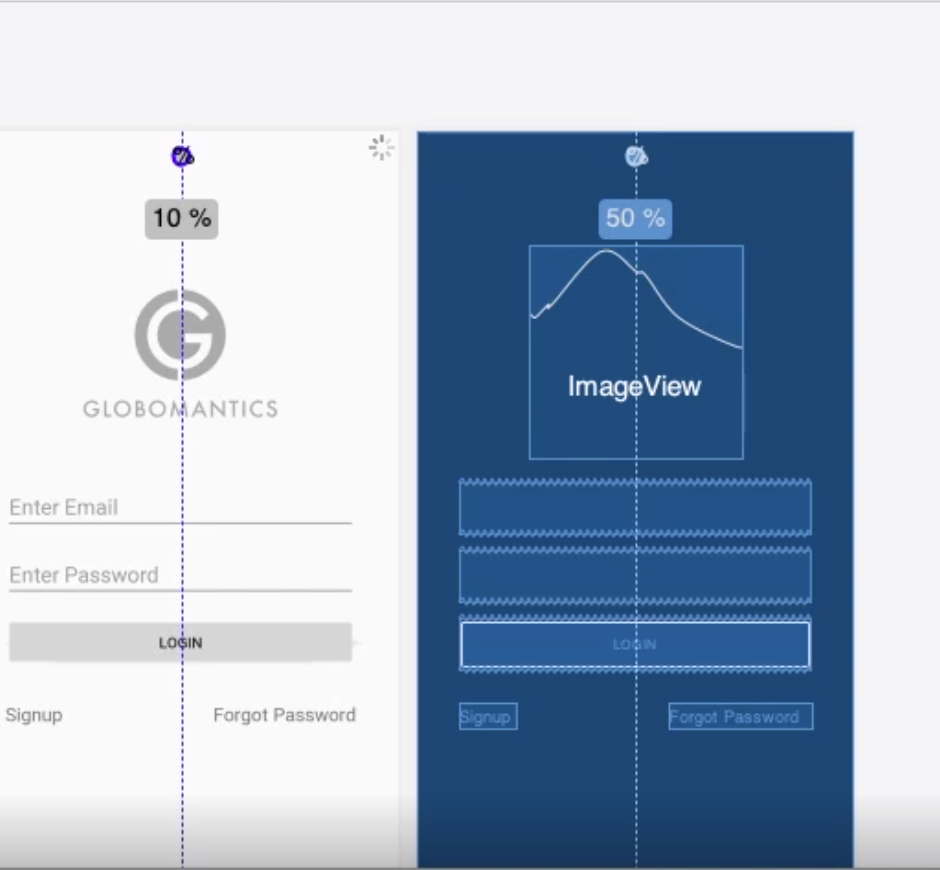
You can add Guidelines to attach to for extra constraints. e.g. for dividing a layout by 50%. These do not show to the user.
