Iain's Electronics Page
Using a Multimeter
Measuring Voltage
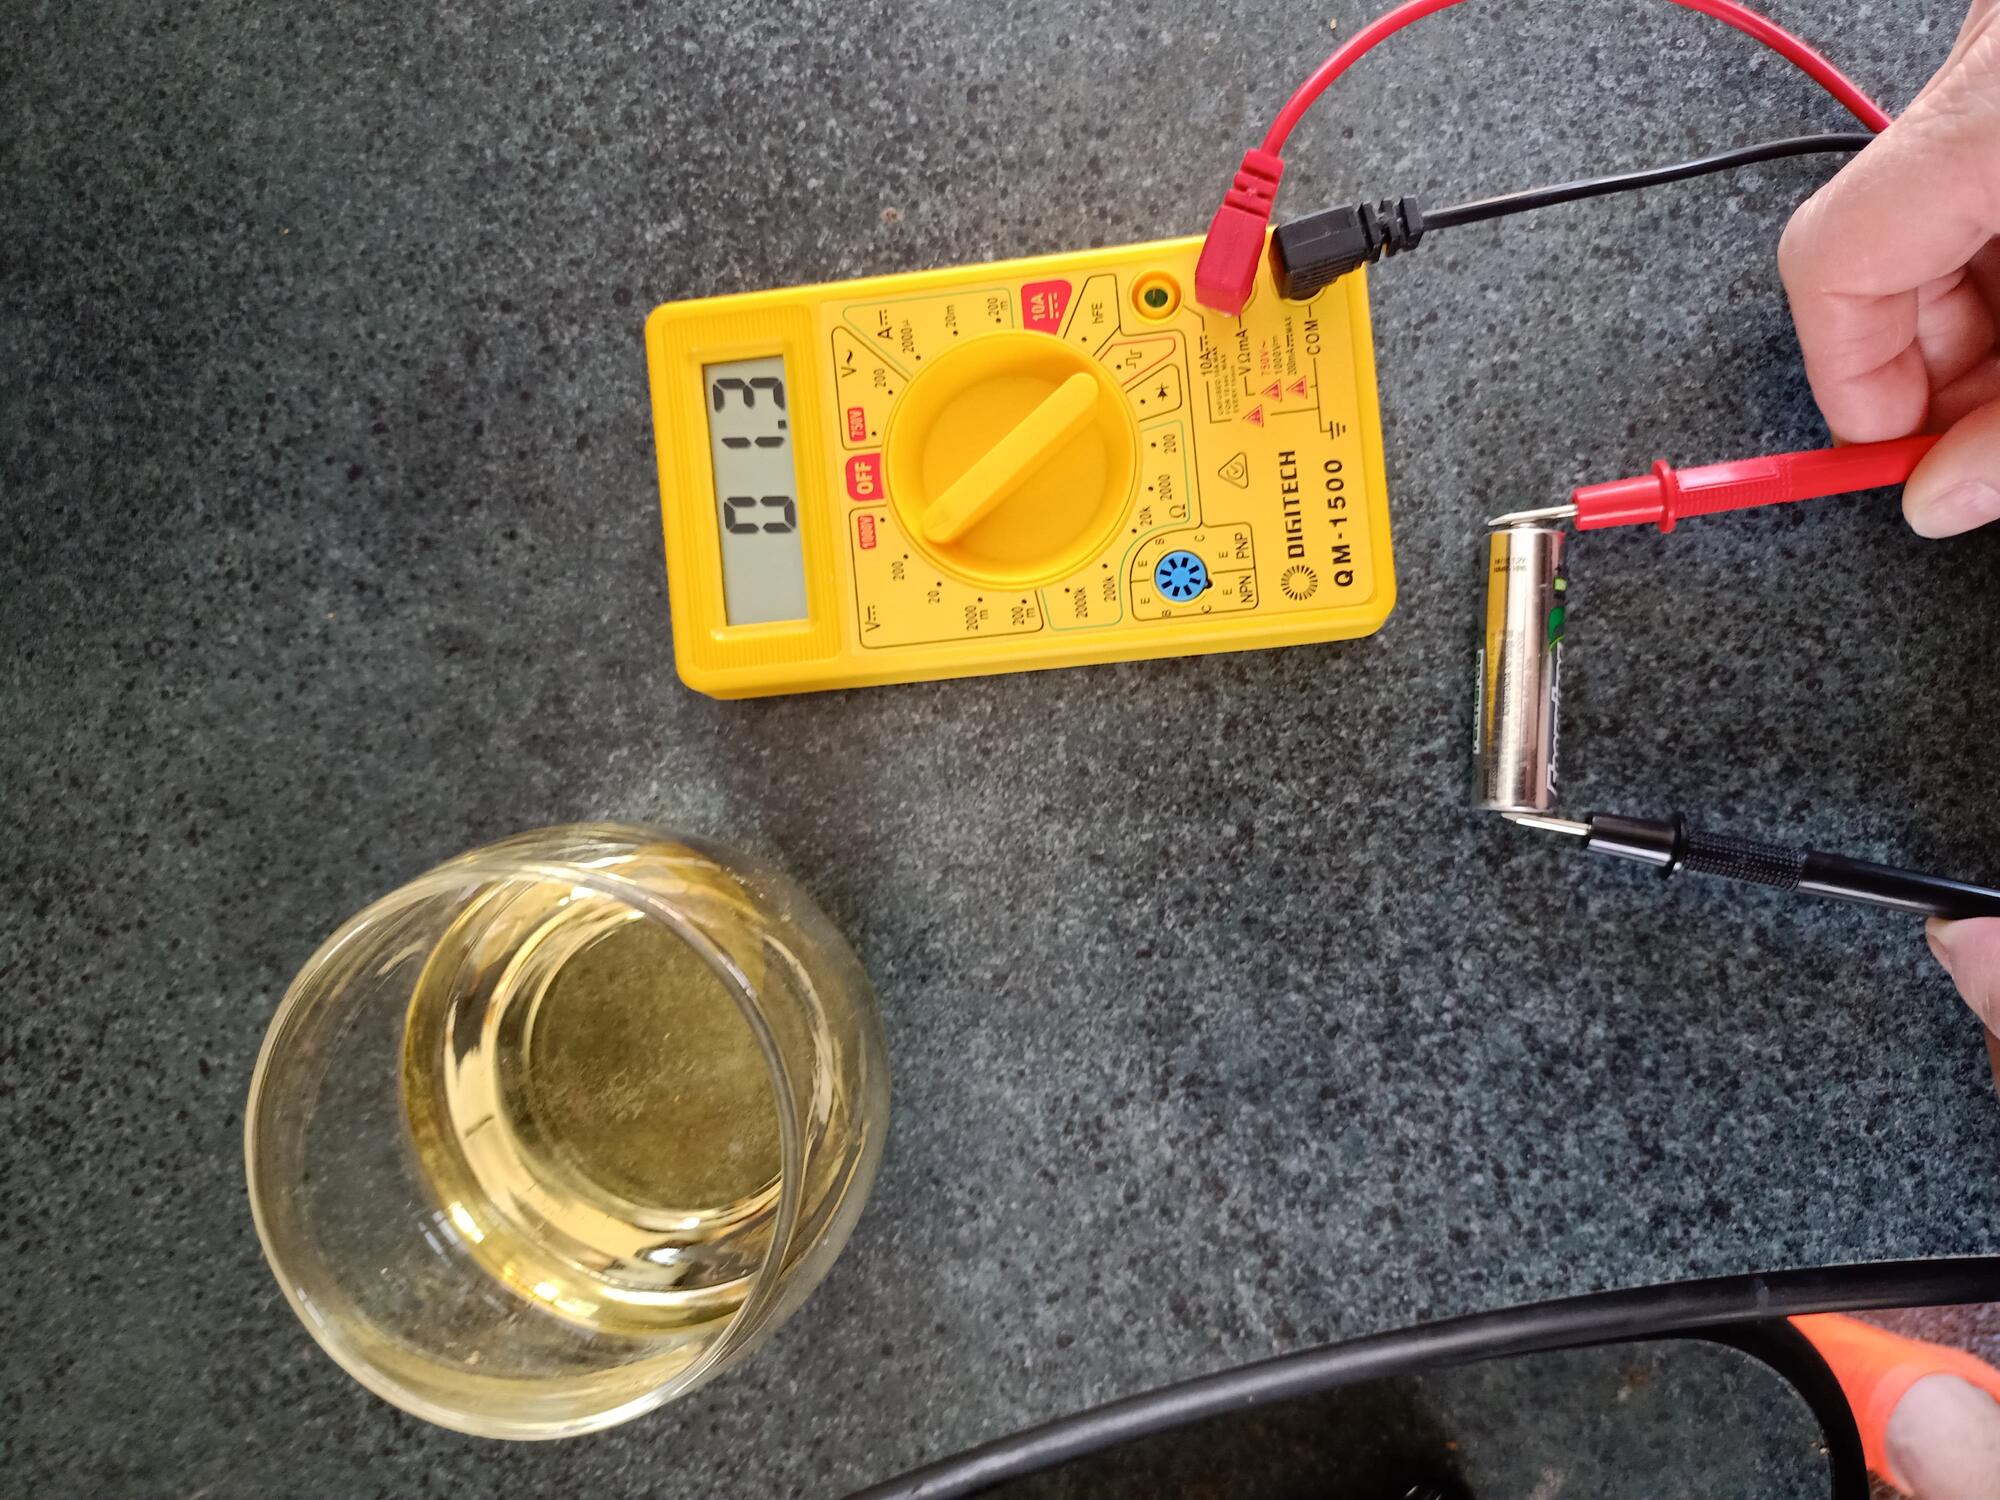
To measure voltage on a battery.This is an example of a 1.4 AA battery.
- black goes to the negative and red to the positive or knobbley end.
- make sure black lead is in COM on the multimeter
- make sure red lead is in V on the multimeter
- connecting in correctly will result in a negative number
- the numbers in the V section are the range in mA.
- using the 200mA will result in 1364 or 1.364 Volts
Measuring Voltage of a Circuit
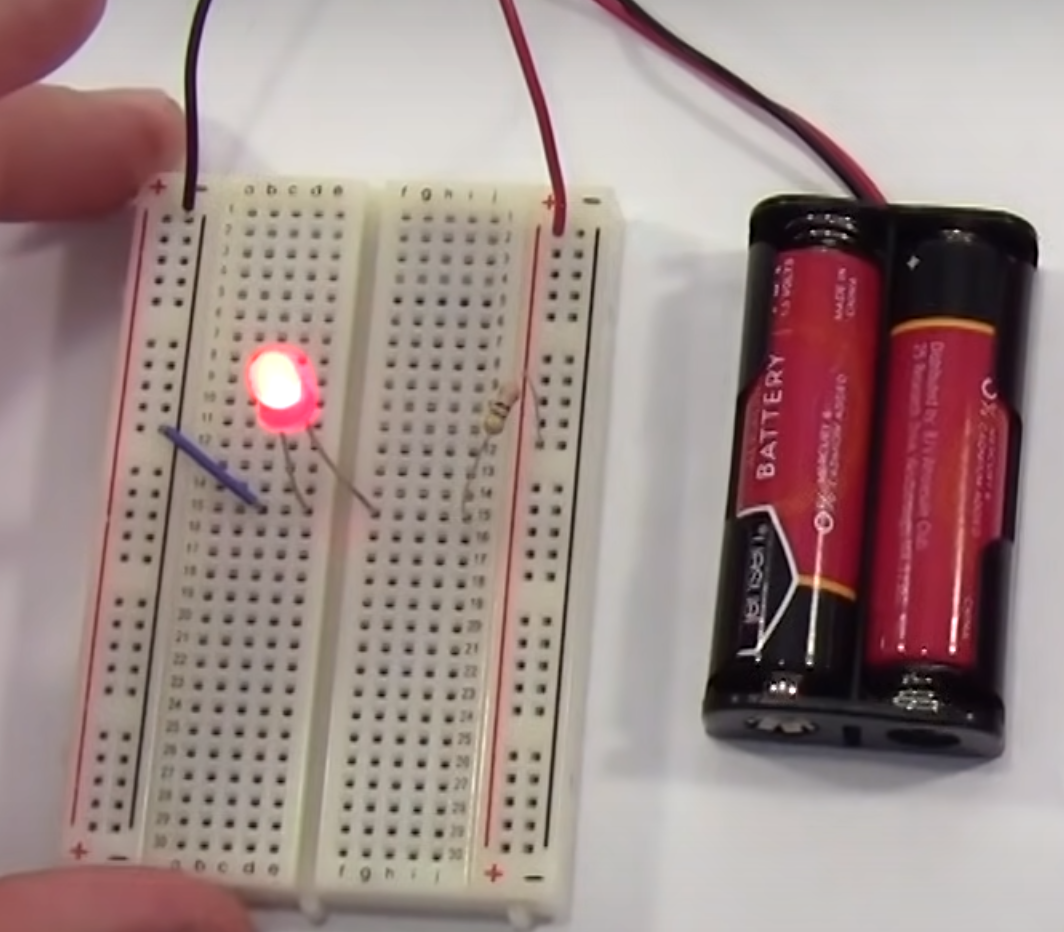
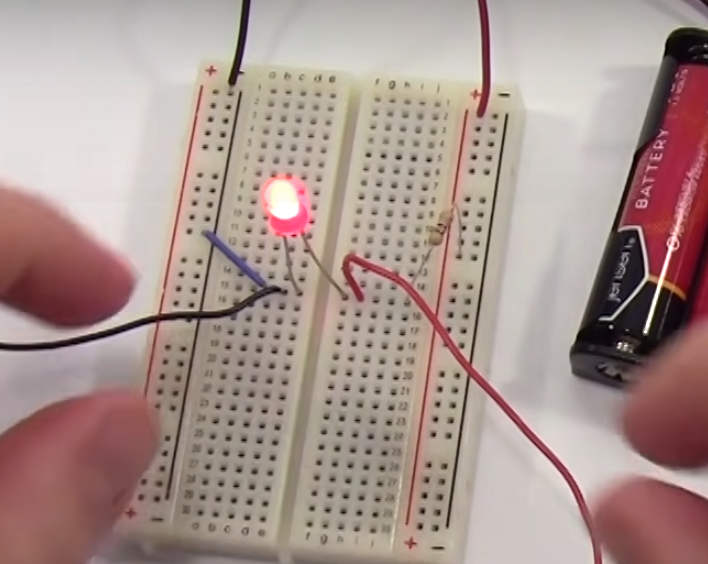
Below we have a circuit with a battery, resister and LED.
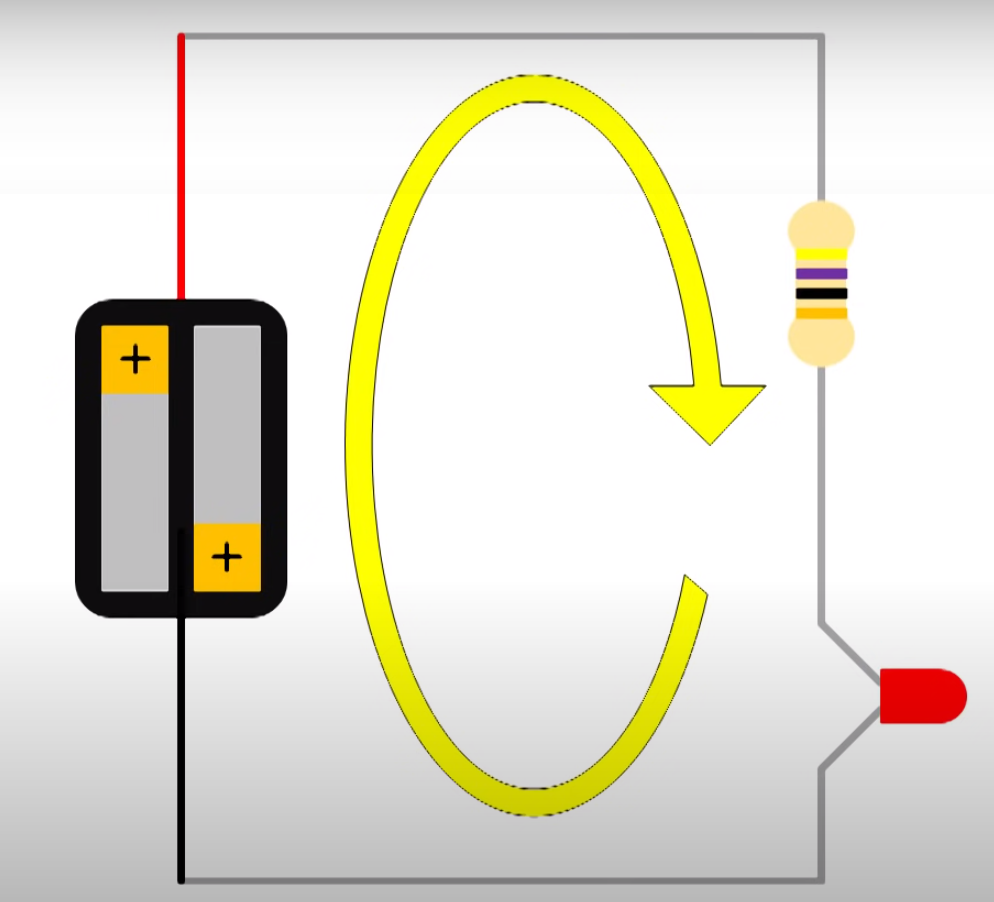
Here would be the circuit diagram.
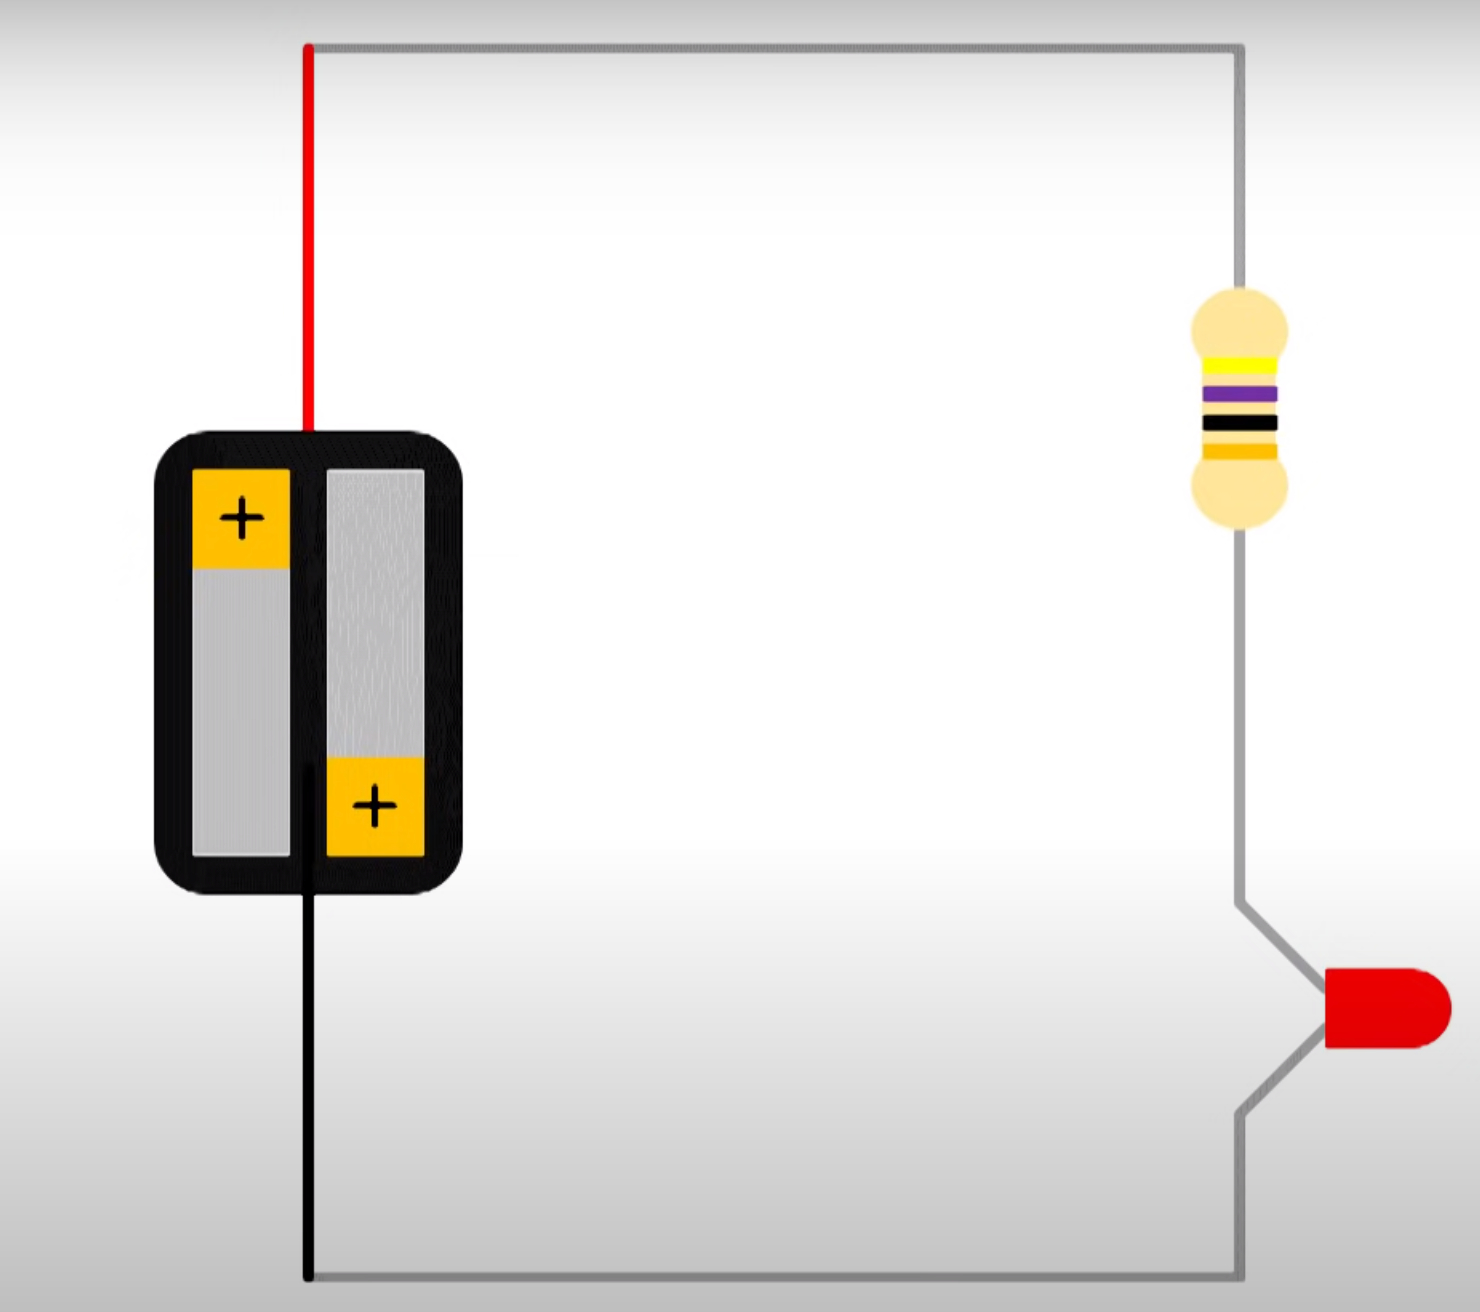
In circuit is said to be in series as one component follows another. We can measure the voltage across any one of the components individually. To measure you connect the multiimeter in parallel which means you put the probes either side of the component. This is said to be measuring in parallel. As usual the black goes to black (negative).
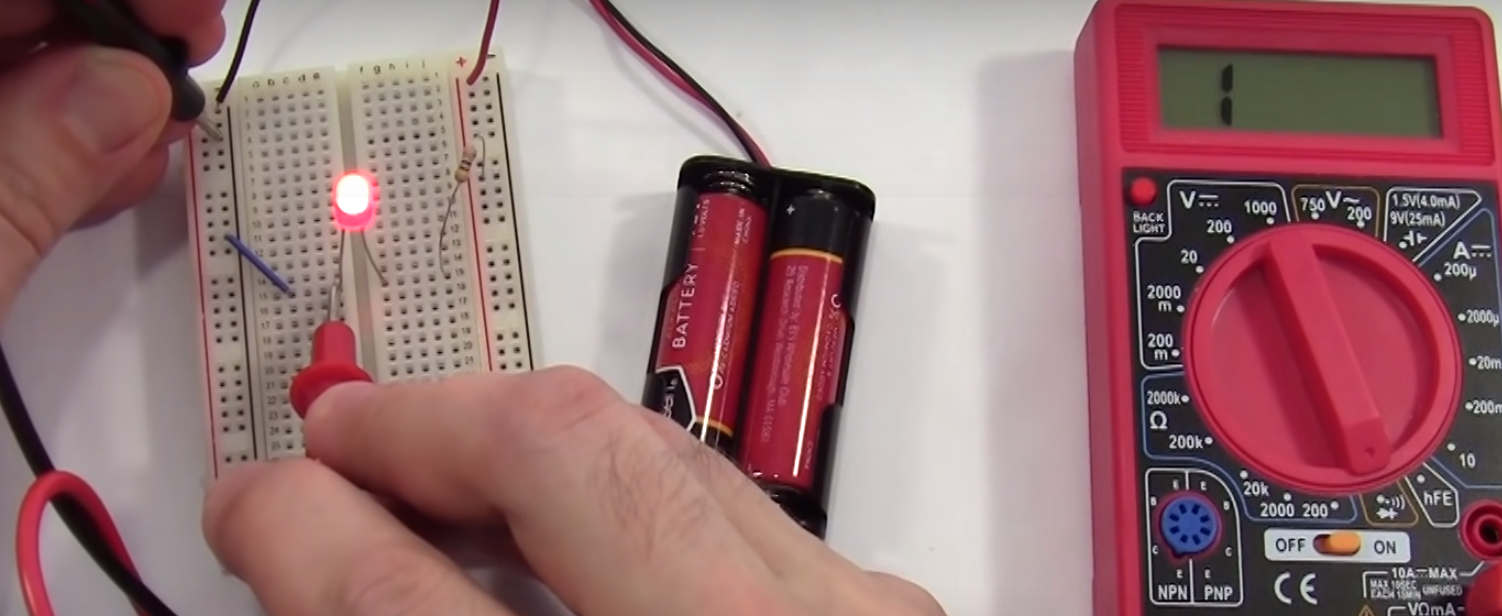
Example of measuring the voltage of the LED.
In our case they measured
- 2.83 battery
- 2.3 led
- 0.64 Resister
Which means the voltage of the led and resister = voltage of the battery.
Measuring Current of a Circuit
This will be the same where ever we measure for the circuit.
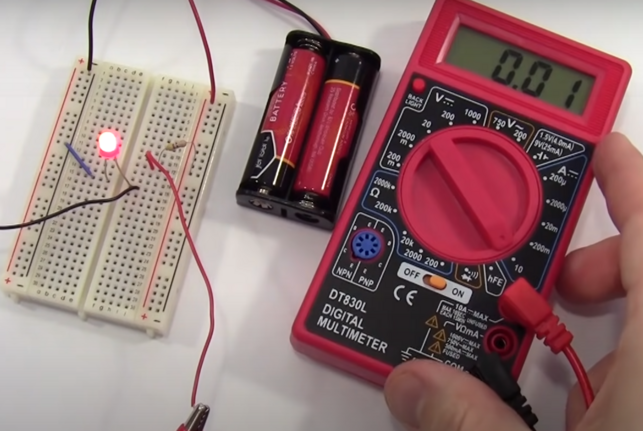
Key Points to measure Current
- Always set the meter back to volts when done because you might blow the fuse
- Always' use the top socket on the multimeter to start because you might blow the fuse
- To measure the current we need to add the probes in series
See the probes are added to the circuit.
Measuring Resistance
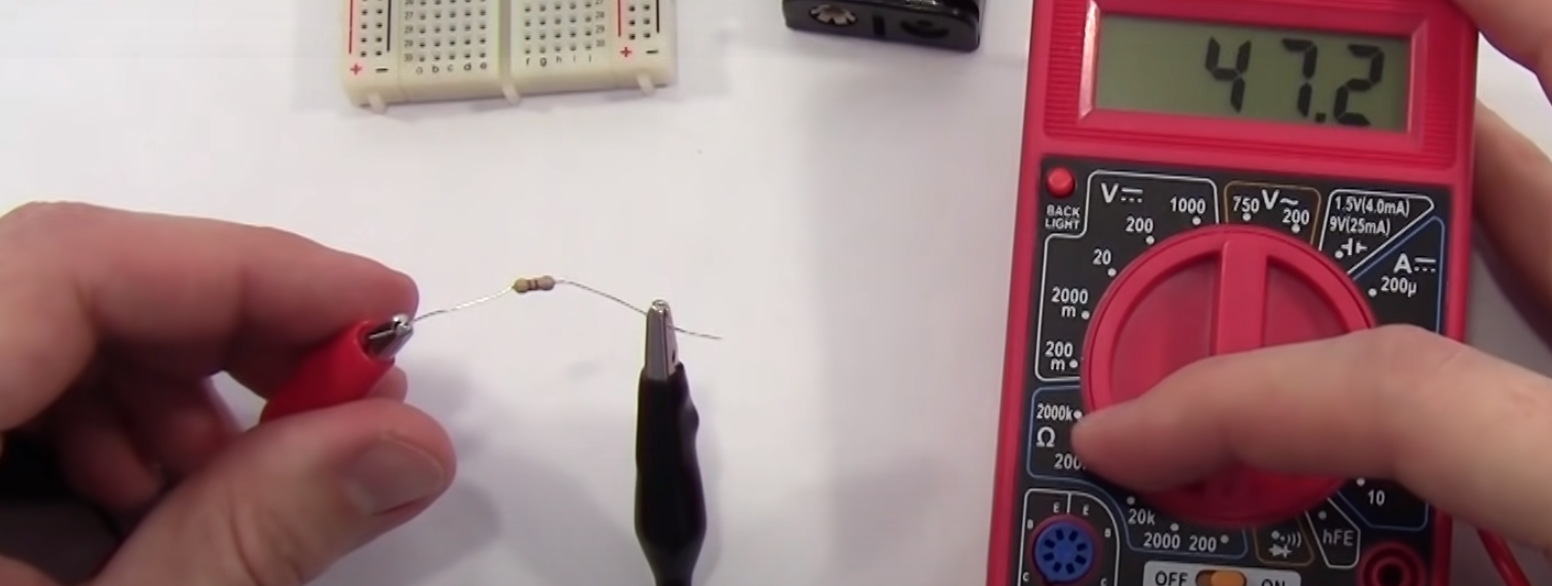
Set to Ω Ohms to measure resistance. Always measure unplugged and not in a live environment. Same as before. Set multimeter to Ohms and use the range appropriately.
Checking a Conductive Path
The final setting which looks like a diode beeps if there is a conductive path. We can now test the circuit to ensure that components are connected.
Breadboards
Origin
This comes from when they did use bread boards with screws in to make a circuit
Usage
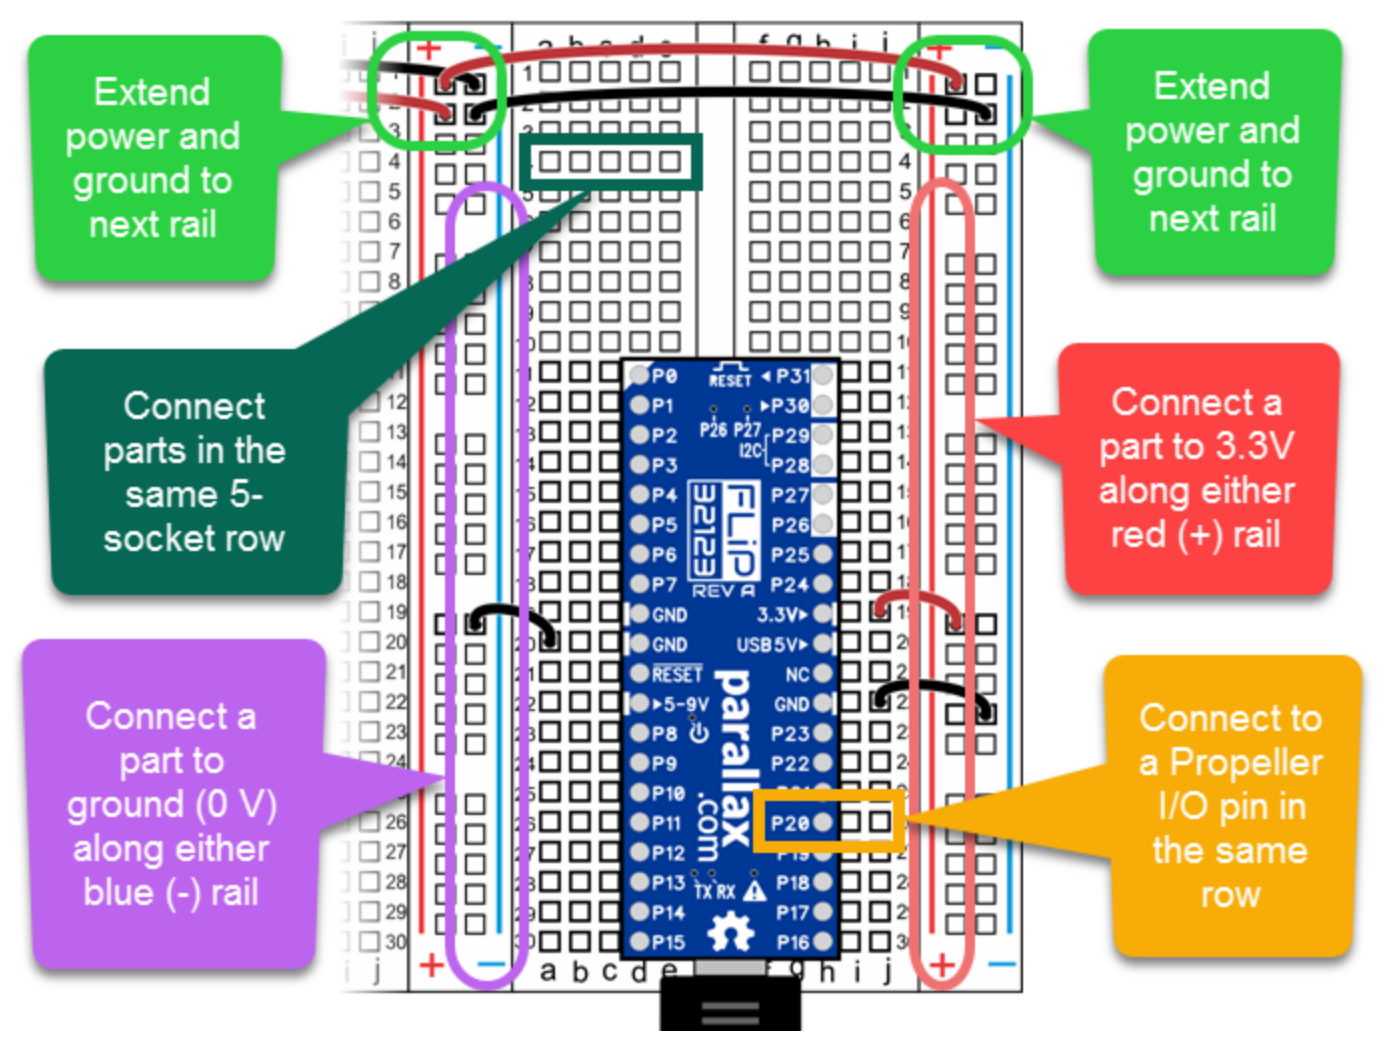
Basically they operate horizontally in the middle and vertically on the outside. Typically the outside rails are for the power supply.
Example Circuit
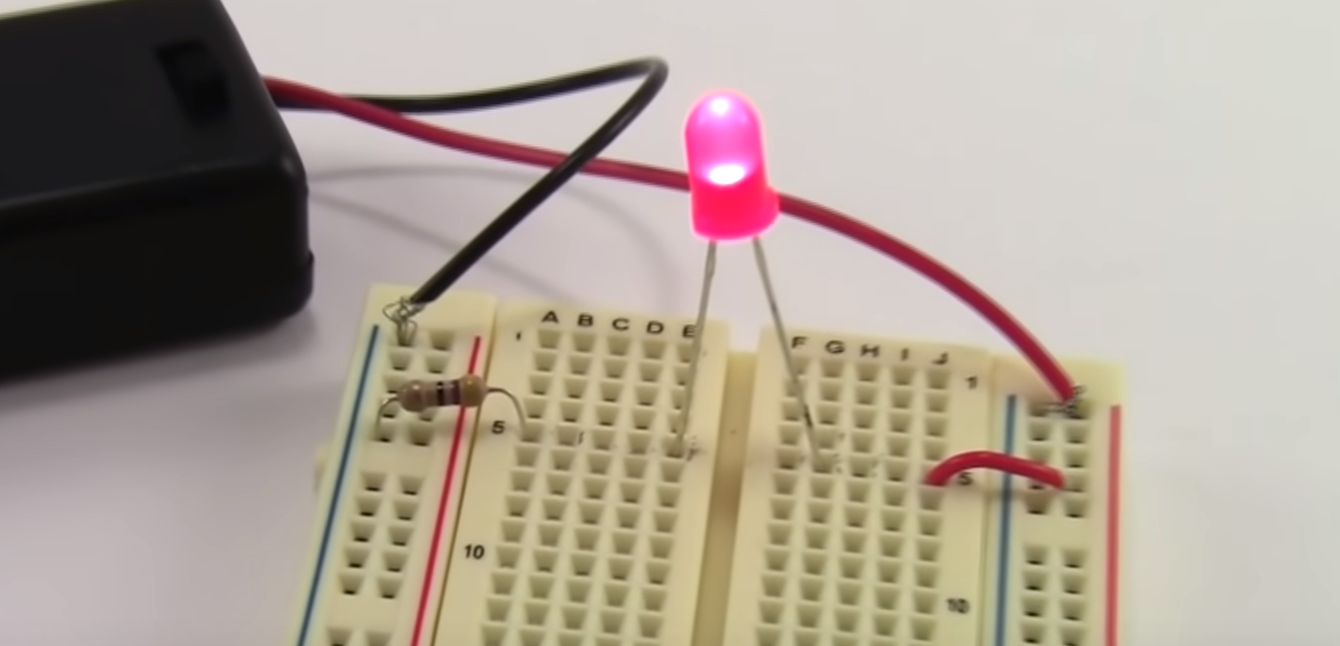
We can see the + and - of the batter is flowing vertically and the components are connected horizontally.
Passive Components
A passive component is an electronic component which can only receive energy, which it can either dissipate, absorb or store it in an electric field or a magnetic field. Passive elements do not need any form of electrical power to operate.
Common examples of passive components include:
- Resistors
- Inductors
- Capacitors
- Transformers
Resisters
Purpose
A resistor is a passive two-terminal electrical component that implements electrical resistance as a circuit element. In electronic circuits, resistors are used to reduce current flow, adjust signal levels, to divide voltages, bias active elements, and terminate transmission lines, among other uses.
Reading Resisters
Here is a chart for reading resisters.
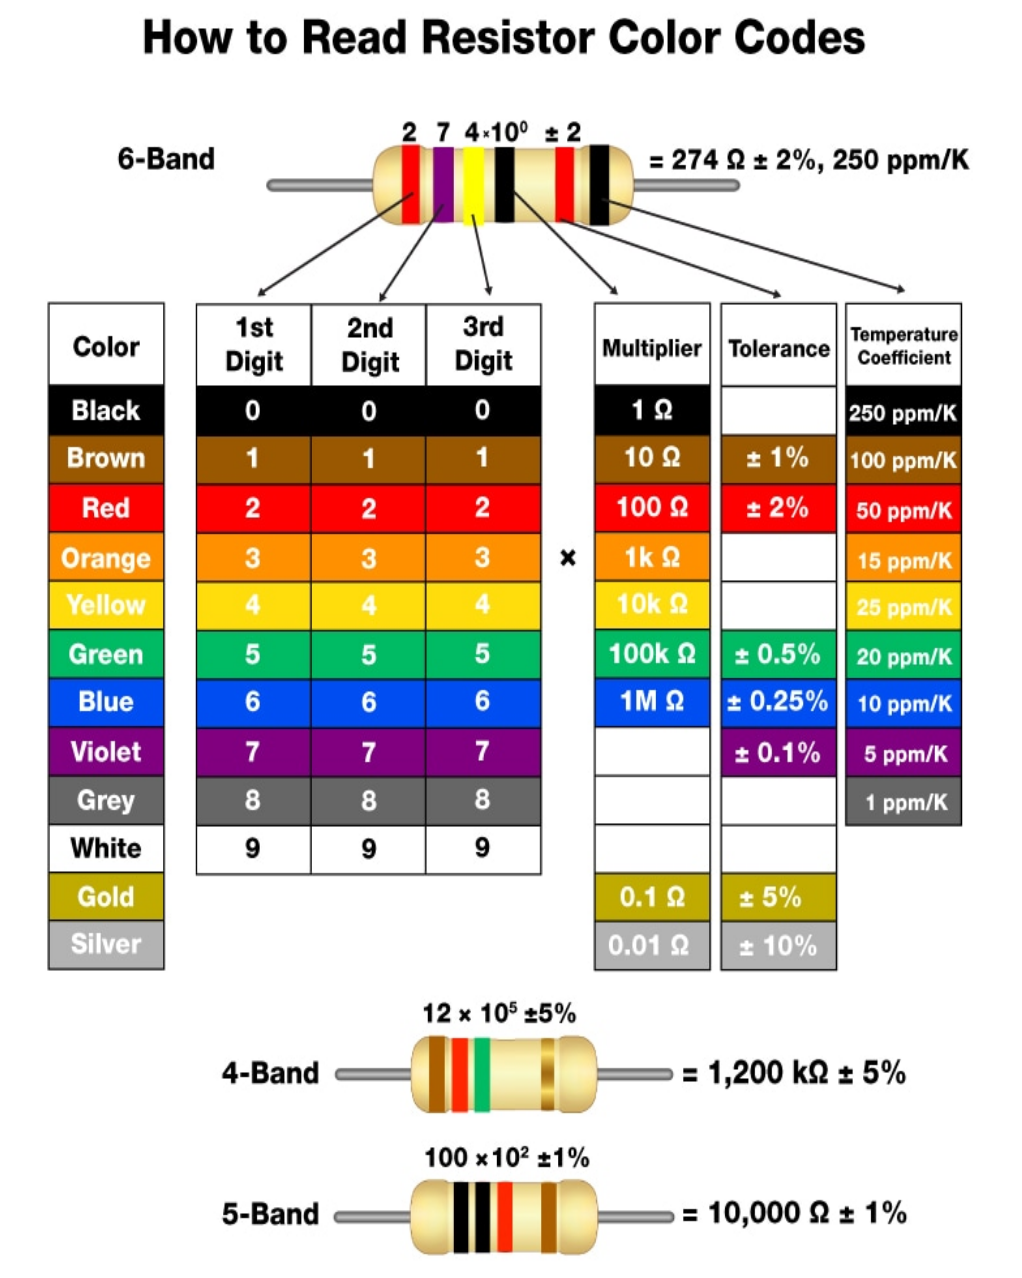
This is a good link too [1]
Inductors
Purpose
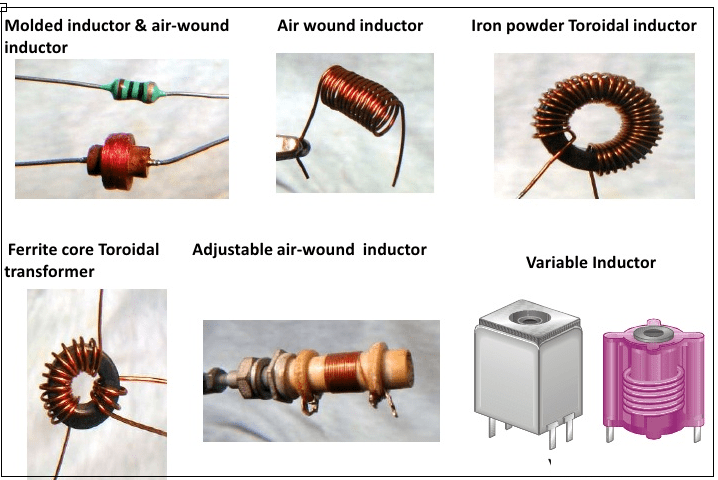
An inductor, also called a coil, choke, or reactor, is a passive two-terminal electrical component that stores energy in a magnetic field when electric current flows through it. An inductor typically consists of an insulated wire wound into a coil around a core. Inductors are typically used as energy storage devices in switched-mode power devices to produce DC current. The inductor, which stores energy, supplies energy to the circuit to maintain current flow during “off” switching periods, thus enabling topographies where output voltage exceeds input voltage
Types
The commonly seen inductor, with a simple winding is this air-Core Inductor. This has nothing but air as the core material. The non-magnetic materials like plastic and ceramic are also used as core materials and they also come under this air-core Inductors.
Capacitors
Purpose
The capacitor store current which can be released when the circuit is under load and the current drops.
Types
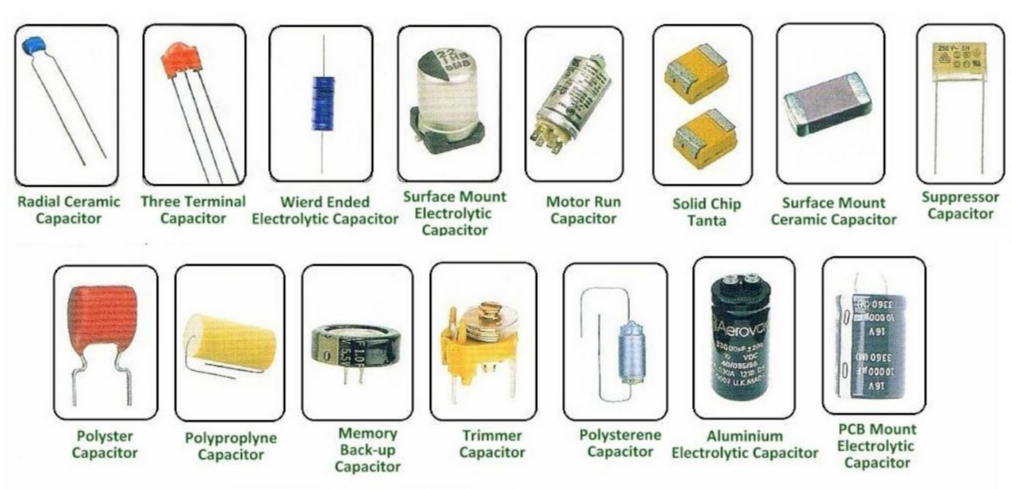
There are different types of capacitor. Electrolytic capacitors and Ceramic capacitors are two common types. The Electrolytic capacitors have a positive and negative (or polarized) and will explode when failing this is because the component contains a liquid inside which can boil.
Equivalent series resistance
Must read up on this.
LEDs
The Voltage of LED are usually based on their color
- Red, Yellow, Blue 2V 20mA
- Green, White 4V
LEDs are polarized so don't forget

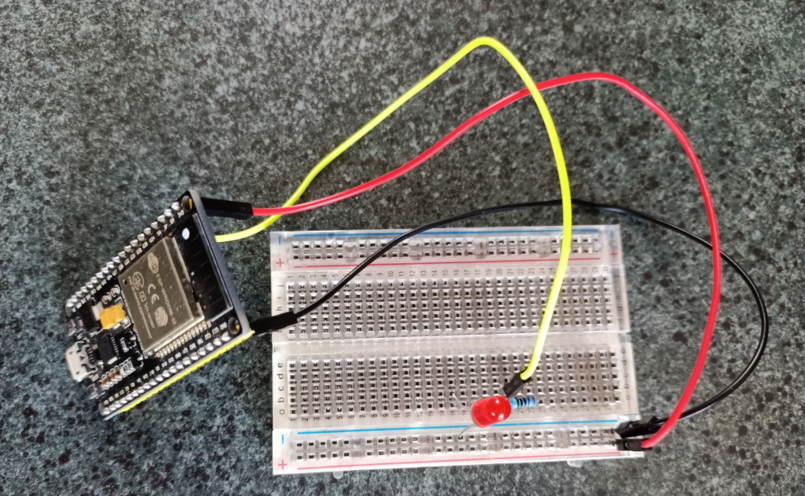
Below is an ESP32 connected to the 3.3V, GND and GPIO 32. The GPIO connects to the resister, the resister connects to the positive of the LED and the LED to Ground
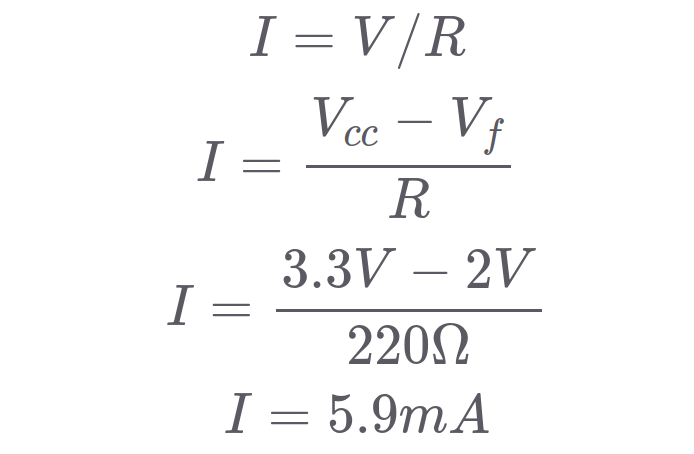
Now asumming ~2V forward voltage for a Red LED, using Ohms law we can see we will get 5mA
And below is the code
const byte led_gpio = 32;

// the setup function runs once when you press reset or power the board
void setup() {
  // initialize digital pin LED_BUILTIN as an output.
  pinMode(led_gpio, OUTPUT);
}

// the loop function runs over and over again forever
void loop() {
  digitalWrite(led_gpio, HIGH);   // turn the LED on (HIGH is the voltage level)
  delay(1000);                       // wait for a second
  digitalWrite(led_gpio, LOW);    // turn the LED off by making the voltage LOW
  delay(1000);                       // wait for a second
}
Display Mapping for GA 9A01 and PICO
- LED backlight, sometimes called BL. (it might be LED anode or cathode)
- GA 9A01 SDA | PICO - MOSI GP3 | - SDA bidirectional data pin. Connect to MOSI
- GA 9A01 SCL | PICO - SCLK GP2 | - SCK clock. sometimes called SCLK, SCL, ...
- GA 9A01 DC | PICO - DC GP18| - A0 data/command pin. sometimes called DC, RS, ...
- GA 9A01 RST | PICO - RST GP19| - *RESET reset pin. you must connect. (or pullup)
- GA 9A01 CS | PICO - CS GP20| - *CS chip select
Transistor
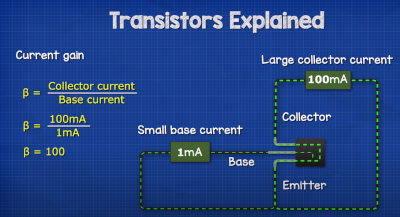
Transistors have 3 pins, base, collector and omitter. When we apply a small current to the base pin, the circuit is completed and it omits a larger current. How much is called the Current Gain and the symbol β
D-Latch
This is how to wire up a 74HC00 for a D-LatchPin 1 to Pin 12
- Pin 2 to Pin 6
- Pin 3 to Pin 4, Q
- Pin 4 to Pin 3
- Pin 5 to Pin 11
- Pin 6 to Pin 2, !Q
- Pin 7 to Gnd
- Pin 8 to Pin 12,
- Pin 9 to Data
- Pin 10 to Pin 13
- Pin 11 to Pin 5
- Pin 12 to Pin 1, Pin 8
- Pin 13 to Pin 10, Clock
- Pin 14 to 5v
Pull Up and Pull Down Resistors
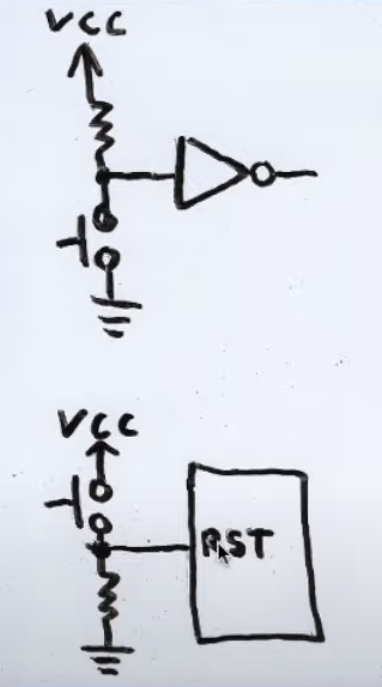
Maybe my dyslexia may something else but strong with this sometimes so here it is for future reference. The top diagram shows a logic low (off) when pressed and a logic high (on) is the bottom picture. The requirement for a resistor is because when the switch is open there is some residual in the air which can make the circuit believe it is closed.
by adding the resistor this force the patch of the voltage appropriately.
